The uReplaceMaterial node lets you override an object’s material with a new material. This can be a standard color material, texture file, or MaterialX file. The material can be applied to
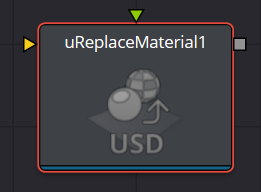
uReplaceMaterial Node Inputs
There are two inputs to the uReplaceMaterial node
Scene Input
The yellow input accepts a USD scene file from a uLoader tool.
Material Input
The green input accepts material files from various tools like uMaterialX, uShader, or even picked from another USD scene using a uLoader tool.
uReplaceMaterial Node Setup
Connect the material output to the rest of the USD tools.
uReplaceMaterial Node Controls
The uReplaceMaterial controls let you change the materials used in a USD scene.
Prim Selection
Pick opens the Scene Tree window that lets you choose specific materials or objects in a USD scene
- Invert Prim Selection: Checking this box inverts the Prim Selection to exclude the materials or objects in the Selected Prims box.
Type
Select the type of material you want to replace the original with.
- Color: Chooses a standard Color material and opens the color controls.
- Texture: Presents a file requester for loading a texture file.
- MaterialX: Presents a file requester for loading a MaterialX file, or choosing a Material from a file attached to the green Material input on the node. Choosing this option closes all other controls.
Diffuse
Lets you change the color of the material, or load a texture.
- Color: Opens a standard color picker to choose a new color for the material.
- Red: Lets you adjust the amount of red in the Material.
- Green: Lets you adjust the amount of green in the Material.
- Blue: Lets you adjust the amount of blue in the Material.
Emissive
Emissive adds a global lighting effect to a shape, creating a layer of color over the
existing texture. It can be adjusted to different levels of intensity and can be used to simulate the
emission of light.
- Color: Opens a standard color picker to choose a new color for the lighting
- Red: Lets you adjust the amount of red in the lighting.
- Green: Lets you adjust the amount of green in the lighting.
- Blue: Lets you adjust the amount of blue in the lighting.
Workflow Mode
Lets you set the mode between Metallic and Specular
Metallic
When enabled, this control shows the Metallic slider. The Metallic slider adds a reflective quality to objects, creating the appearance of metal. It enhances the reflective properties of a shape
Specular
When enabled, this shows the Specular Color controls. Specular Color determines the color of light that reflects from a shiny surface. The more specular a material is, the glossier it appears.
Roughness
Affects the amount of light reflection and scattering on a surface, giving it a smoother or more textured appearance, depending on the setting. It is a key element in creating realistic reflections.
Clearcoat
Affects the appearance of a surface by adding a glossy layer on top of it, mimicking the effect of a protective coating. It is commonly used in creating materials like car paint or polished metal.
Clearcoat Roughness
Adjusts the level of imperfection or smoothness of the glossy layer added on top of a surface. This can affect the realism and reflection of materials like car paint or polished metal.
Opacity
Reduces the material and object opacity, impacting the color and Alpha values of the shape.
Opacity Threshold
Adjusts where the opacity starts to appear.
Common Controls
The Settings tab in the Inspector is also duplicated in other USD nodes.

