
The uCamera node generates a virtual camera for viewing the USD scene in its 3D environment. It closely emulates the settings used in real cameras to make matching live-action or 3D-rendered elements as seamless as possible. Adding any cameras to a 3D composite allows you to frame the elements in a composite how you want and animate the camera during a scene to create moving camera shots.
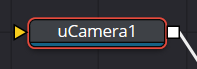
uCamera Node Input
There is one Scene Input in yellow to attach a USD scene. This allows you to adjust any existing cameras within the scene.
uCamera Node Setup
Displaying a uCamera node directly in the viewer shows only an empty scene; there is nothing for the camera to see. To view the scene through the camera, view the uMerge node where the uCamera is connected, or any node downstream of that uMerge. Then right-click on the viewer and select uCamera > [Camera name] from the contextual menu. Right-clicking on the axis label found in the lower corner of each USD viewer also displays the Camera submenu.
The aspect of the viewer may be different from the aspect of the camera, so the camera view may not match the actual boundaries of the image rendered by the uRenderer node. Guides can be enabled to represent the portion of the view that the camera sees and assist you in framing the shot. Right-click on the viewer and select an option from the Guides > Frame Aspect submenu. The default option uses the format enabled in the Composition > Frame Format preferences. To toggle the guides on or off, select Guides > Show Guides from the viewers’ contextual menu, or use the Command-G (macOS) or Ctrl-G (Windows) keyboard shortcut when the viewer is active.
uCamera Node Controls Tab
The Controls tab contains some of the most fundamental camera settings, including the camera’s clipping plains, focal length, and film back properties.
Override Selection
Pressing the Pick button lets you choose an existing camera in an attached USD file to allow adjusting the cameras in an imported scene.
Projection Type
The Projection Type menu is used to select between Perspective and Orthographic cameras. Generally, real-world cameras are perspective cameras. An orthographic camera uses parallel orthographic projection, a technique where the view plane is perpendicular to the viewing direction. This produces a parallel camera output that is undistorted by perspective.
Orthographic cameras present controls only for the near and far clipping planes and a control to set the viewing scale.
Near/Far Clip
The clipping planes are used to limit what geometry in a scene is rendered based on an object’s distance from the camera’s focal point. Clipping planes ensure objects that are extremely close to the camera, as well as objects that are too far away to be useful, are excluded from the final rendering.
The default perspective camera ignores this setting unless the Adaptive Near/Far Clip checkbox located under the Near/Far Clip control is disabled.
The clip values use units, so a far clipping plane of 20 means that any object more than 20 units from the camera is invisible to the camera. A near clipping plane of 0.1 means that any object closer than 0.1 units is also invisible.
Exposure
When selected, the renderer automatically adjusts the camera’s Near/Far Clipping plane to match the extents of the scene. This setting overrides the values of the Near and Far clip range controls described above. This option is not available for orthographic cameras.
Focal Length
In the real world, a lens’ focal length is the distance from the center of the lens to the film plane. The shorter the focal length, the closer the focal plane is to the back of the lens. The focal length is measured in millimeters. The angle of view and focal length controls are directly related. Smaller focal lengths produce a wider angle of view, so changing one control automatically changes the other to match.
The relationship between focal length and angle of view is angle = 2 * arctan[aperture / 2 / focal_length]. Use the vertical aperture size to get the vertical angle of view and the horizontal aperture size to get the horizontal angle of view.
Focal Distance
Like a focal point on a real-world camera, this setting defines the distance from the camera to an object and is used to calculate depth of field.
F Stop
This is used to define the aperture size of the synthetic lens; it will affect exposure and is used to calculate depth of field.
Film Back
This section allows you to control the technical parameters of the non-lens part of the camera.
Horizontal/Vertical Aperture
The Horizontal Aperture Width and Vertical Aperture Height sliders control the dimensions of the camera’s aperture or the portion of the camera that lets light in on a real-world camera. In video and film cameras, the aperture is the size of the opening that defines the area of each frame exposed, also known as sensor size.
Lens Shift X/Y
Provides controls to manually offset the camera lens width and height.
Shutter Close / Open
These define when the shutter of the camera will open and close; this will affect Exposure and Motion Blur.
Stereo Role
If the camera is stereo, this defines the center of role for the two cameras, left, center, or right.
Control Visibility
This section allows you to selectively activate the onscreen controls that are displayed along with
the camera.
- Show View Controls: Displays or hides all camera onscreen controls in the viewers.
- Frustum: Displays the actual viewing cone of the camera.
- View Vector: Displays a white line inside the viewing cone, which can be used to determine the center of the frame.
- Near Clip: The Near Clipping plane. This plane can be subdivided for better visibility.
- Far Clip: The Far Clipping plane. This plane can be subdivided for better visibility.
- Focal Plane: The plane set by the Focus Distance. This plane can be subdivided for better visibility.
- Convergence Distance: The point of convergence when using Stereo mode. This plane can be subdivided for better visibility.
Common Controls
The Transform and Settings tab in the Inspector are also duplicated in other USD nodes.

