Paint is an extremely flexible, stroke-based tool for wire and rig removal, image cloning, or to create custom masks and mattes rapidly. Fusion’s paint can even be used to create new images and artistic elements from scratch.
Each Paint node is made up of a series of brush strokes. These strokes are vector shapes with editable brush, size, and effect. A wide range of apply modes and brush types are available.
Most Brushstrokes styles are editable polylines for fine control. They can be animated to change shape, length, and size over time. The opacity and size of a stroke can be affected by velocity and pressure when used with a supported tablet.
Unlimited undo and redo of paint provides the ability to experiment before committing changes to an image sequence. Paint strokes can be reordered, deleted, and modified with virtually infinite flexibility.
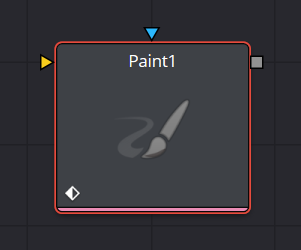
Paint Node Inputs
The two inputs on the Paint node are used to connect a 2D image and an effect mask which can be used to limit the painted area.
Input
It is required to connect the orange input with a 2D image that creates the size of the “canvas” on which you paint.
Effect Mask
The blue input is for a mask shape created by polylines, basic primitive shapes, paint strokes, or bitmaps from other tools. Connecting a mask to this input limits the Paint to only those pixels within the mask.
Paint Node Setup
The Paint node always needs an input connection. The simplest setup is to paint directly on the incoming MediaIn node.
A more flexible setup is to use a Background node to set the size that matches the image you are painting on. In the Inspector, the background would be set to be fully transparent. Then, the Paint tool can be merged as the foreground over the actual image you want to paint on.
Types of Paint Strokes

To begin working with the Paint tool, first select the paint stroke type from the Paint toolbar above the viewer. There are ten stroke types to choose from as well as two additional tools for selecting and grouping paint strokes. The stroke types and tools are described below in the order they appear in the toolbar.
Multistroke
Although this is the default selection and the first actual brush type in the toolbar, Multistroke is not typically the stroke type most often used. However, it’s perfect for those 100-strokes-per-frame retouching paint jobs like removing tracking markers. Multistroke is much faster than the Stroke type but is not editable after it is created. By default, Multistroke lasts for one frame and cannot be modified after it has been painted. Use the Duration setting in the Stroke controls to set the number of frames before painting. A shaded area of the Multistroke duration is visible but not editable in the Keyframes Editor. While Multistrokes aren’t directly editable, they can be grouped with the PaintGroup modifier, then tracked, moved, and rotated by animating the PaintGroup instead.
Clone Multistroke
Similar to Multistroke but specifically meant to clone elements from one area or image to the other. Perfect for those 100-strokes-per-frame retouching paint jobs like removing tracking markers. Clone Multistroke is faster than the Stroke type but is not editable after it is created. By default, Clone Multistroke lasts for one frame and cannot be modified after it has been painted. Use the Duration setting in the Stroke controls to set the number of frames before painting. A shaded area of the Clone Multistroke duration is visible but not editable in the Keyframes Editor.
Stroke
In most cases, the Stroke tool is what people think of when they think of paint and is the tool of choice for most operations. It is a fully animatable and editable vector-based paint stroke. It can become slow if hundreds of strokes are used in an image; when creating a lot of paint strokes, it is better to use Multistroke. The Stroke type has a duration of the entire global range. However, you can edit its duration at any time in the Keyframes Editor. When the painting is complete, choose the Select button in the Paint toolbar to avoid accidentally adding new strokes.
Polyline Stroke
This provides the ability to create and manipulate a stroke in the same way that a Bézier path or polygon mask might be created. To add a Polyline Stroke, select the Polyline button and click in the viewer to add the first point. Continue clicking to add additional points to the polyline. This click append style is the default, but polyline strokes can also be created in draw append mode. Polylines can be tracked or connected to existing polylines like masks or animation paths. The Polyline Stroke has a default duration of the entire global range. However, you can edit its duration at any time in the Keyframes Editor.
Circle
Creates a circular shape with animatable control over radius and center. The Circle type has a duration of the entire global range. However, you can edit its duration at any time in the Keyframes Editor.
Rectangle
Creates a rectangular area. The Rectangle type has a duration of the entire global range. However, you can edit its duration at anytime in the Keyframes Editor.
Copy Polyline
Allows you to create a closed Polyline area with animatable offset to clone elements from one area or image to the other. The Copy Polyline type has a duration of the entire global range. However, you can edit its duration at any time in the Keyframes Editor.
Copy Circle/Rectangle
A circular or rectangular shape area with animatable offset to clone elements from one image to the other. The Copy Circle/Rectangle type has a duration of the entire global range. However, you can edit its duration at any time in the Keyframes Editor.
Fill
Similar to the Wand mask tool. This tool fills similarly colored adjacent pixels with a fill color based on the selected color channel. The tool has a duration of the entire global range. However, you can edit its duration at any time in the Keyframes Editor
Paint Group
Allows you to group multiple paint strokes with full control over center and size. Since Multistroke and Clone Multistroke styles cannot be tracked, grouping these paint stroke types and tracking the paint group is one common use of groups.
Editing Options Toolbar
Polyline-based paint strokes include a second toolbar in the viewer to select different editing options. The paint strokes that include this second toolbar are Polyline Stroke and Copy Polyline.

The Stroke style also displays this toolbar after the stroke is selected and the Make Editable button is clicked in the Inspector.
Click Append
This is the default option when creating a polyline stroke. It works more like a Bézier pen drawing tool than a paintbrush tool. Clicking sets a control point and appends the next control point when you click again in a different location.
Draw Append
This is a freehand drawing tool. It paints a stroke similar to drawing with a pencil on paper. You can create a new Polyline Stroke or Copy Polyline Stroke using the Draw tool, or you can extend a Stroke style after clicking the Make Editable button in the Inspector.
Insert
Insert adds a new control point along the paint stroke spline.
Modify
Modify allows you to safely move or smooth any exiting point along a spline without worrying about adding a new point accidentally
Done
Prevents any point along the spline from being moved or modified. Also, new points cannot be added. You can, however, move and rotate the entire spline.
Closed
Closes an open polyline.
Smooth
Changes the selected stroke or control point from a linear to a smooth curve.
Linear
Changes the selected stroke or control point from a smooth curve to linear.
Select All
Selects all the control points on the polyline.
Keys
Shows or hides the control points along the polyline.
Handles
Shows or hides the Bézier handles along the polyline.
Shape
Places a reshape rectangle around the selected polyline control points. Using the reshape rectangle, you can deform groups of polyline control points or entire shapes much easier than modifying each point.
Delete
Deletes the selected control point(s).
Reduce
Opens a Freehand precision window that can be used to reduce the number of control points on a polyline. This can make the paint stroke easier to modify, especially if it has been created using the Draw tool.
Publish
You can use the Publish menu to either publish control points or the path. Publishing is a form of parameter linking. It makes the selected item available for use by other controls, or to attach a control point to a tracker.
Follow Points
Allows a selected point to follow the path of a published point. The point follows the published point using an offset position.
Roto Assist
Enable the Roto Assist button when you begin painting with the Polyline Stroke tool. The polyline points snap to the closest edge as you click to add points to the shape. A cyan outline indicates the points that have snapped to an edge. There are three main Roto Assist options selectable through the drop-down menu:
Multiple Points
When enabled, a single click on a high-contrast edge will add multiple points to define the entire edge, instead of having to add each point individually. This is a one time only click. The second click reverts to single point edge detection.
Distance 8
Opens a dialog where you can set the pixel range within which searching for an edge will take place.
Reset
Used for resetting the snap attribute of all snapped points. After resetting, the points will become unavailable for tracking.
Paint Node Controls Tab
Not all of the controls described here appear in all modes. Some controls are useful only in a specific Paint mode and do not appear when they are not applicable. The Controls tab is used to configure your paint settings before painting. Once a paint stroke is created, except for the Multistroke and Clone Multistroke, you can select the stroke in the viewer and update the controls.
Paint Node Brush Controls
Brush Shape
The brush shape buttons select the brush tip shape. Except for the single pixel shape, you can modify the size of the brush shape in the viewer by holding down the Command or Ctrl key while dragging the mouse.
- Soft Brush: The Soft Brush type is a circular brush tip with soft edges.
- Circular Brush: A Circular Brush is a brush tip shape with hard edges.
- Image Brush: The Image Brush allows images from any node in the node tree, or from a file system, to be used as a brush tip.
- Single Pixel Brush: The Single Pixel Brush is perfect for fine detail work, creating a brush tip precisely one pixel in size. No anti-aliasing is applied to the single pixel brush.
- Square Brush: A Square Brush is a brush tip with hard edges.
Vary Size
Vary size settings change the stroke size based on speed or a pressure-sensitive pen and tablet.
- Constant: The brush tip remains a constant size over the stroke.
- With Pressure: The stroke size varies with the actual applied pressure.
- With Velocity: The stroke size varies with the speed of painting. The faster the stroke, the thinner it is.
Vary Opacity
Vary opacity settings change the stroke opacity based on speed or a pressure-sensitive pen and tablet.
- Constant: The brush tip remains at a constant transparency setting over the entire stroke.
- With Pressure: The stroke transparency varies with the applied pressure.
- With Velocity: The stroke transparency varies with the speed of painting. The faster the stroke, the more transparent it is.
Softness
Use this control to increase or decrease the Softness of a soft brush.
Image Source
When using the Image Source brush type, select between three possible source brush images.
- Node: The image source is derived from the output of a node in the node tree. Drag the node into the Inspector’s Source node input field to set the source.
- Clip: The image source is derived from an image or sequence on disk. Any file supported by Fusion’s Loader or MediaIn node can be used.
- Brush: Select an image to use as a brush from the menu. Images located in the Fusion > Brushes directory are used to populate the menu.
Color Space
When the Fill tool is selected, a Color Space menu selects the color space when sampling colors around the Fill tool center for inclusion in the fill range.
Channel
When the Fill tool is selected, a Channel menu selects which color channel is used in the fill paint. For example, with alpha selected, the fill occurs on contiguous pixels of the alpha channel.
Paint Node Apply Controls
Apply Mode
The Apply Modes are buttons that change a brush’s painting functionality.
Color
The Color Apply Mode paints simple colored strokes. When used in conjunction with an image brush, it can also be used to tint the image.
Clone
The Clone Apply Mode copies an area from the same image using adjustable positions and time offsets. This mode can also copy portions of one image into another image. Any image from the node tree can be used as the source image.
Emboss
The Emboss Apply Mode embosses the portions of the image covered by the brush stroke.
Erase
Erase reveals the underlying image through all other strokes, effectively erasing portions of the strokes beneath it without actually destroying the strokes.
Merge
This Apply Mode effectively merges the brush onto the image. This mode behaves in much the same way as the Color Apply Mode but has no color controls. It is best suited for use with the image brush type.
Smear
Smear the image using the direction and strength of the brushstroke as a guide.
Stamp
Stamps the brush onto the image, completely ignoring any alpha channel or transparency information. This mode is best suited for applying decals to the target image.
Wire
This Wire Removal Mode is used to remove wires, rigging, and other small elements in the frame by sampling adjacent pixels and draw them in toward the stroke.
Stroke Controls
The stroke controls contain parameters that adjust the entire stroke of paint as well as control it over time.
Size
This control adjusts the size of the brush when the brush type is set to either Soft Brush or Circle. The diameter of the brush is drawn in the viewer as a small circle surrounding the mouse pointer. The size can also be adjusted interactively in the viewer by holding the Command or Ctrl key while dragging the mouse pointer.
Spacing
The Spacing slider determines the distance between dabs (samples used to draw a continuous stroke along the underlying vector shape). Increasing this value increases the density of the stroke, whereas decreasing this value causes the stroke to assume the appearance of a dotted line.
Stroke Animation
The Stroke Animation menu provides several pre-built animation effects that can be applied to a paint stroke. This menu appears only for vector strokes like Stroke and Polyline Stroke.
All Frames
This default displays the stroke for all frames of the image connected to the orange background input of the Paint node.
Limited Duration
This exists on the number of frames specified by the Duration slider.
Write On
When Write On is selected, an animation spline is added to the paint stroke that precisely duplicates the timing of the paint stroke’s creation. The stroke is written on the image exactly as it was drawn. To adjust the timing of the Write On effect, switch to the Spline Editor and use the Time Stretcher node to adjust the overall length of the animation spline. To smooth or manually adjust the motion, try reducing the points in the animation spline.
Write On Then Off
This menu option applies a Write On and then a Write Off animation mode to the stroke.
Trail
Selecting the Trail option from the menu causes both the start and end points of the stroke to be animated simultaneously, offset from each other by the amount specified in the Duration control. This has the effect of creating a painted segment that follows the stroke path. As with the Write On and Write Off effects, this starts on the current frame when the animation mode is selected. The timing of the animation can be adjusted manually using the Spline or Keyframes Editors.
Duration
Duration sets the duration of each stroke in frames. This control is present only for Multistroke and Clone Multistroke, or when the stroke animation mode is set to Limited Duration. It is most commonly employed for frame-by-frame rotoscoping through a scene. Each Vector stroke applied to a scene has a duration in the Keyframes Editor that can be trimmed independently from one stroke to the next. The duration can be set to 0.5, which allows each stroke to last for a single field only when the node tree is processing in Fields mode.
Write On and Write Off
This range slider appears when the Stroke Animation is set to one of the Write On and Write Off methods. The range represents the beginning and end points of the stroke. Increase the Start value from 0.0 to 1.0 to erase the stroke, or increase the End value from 0.0 to 1.0 to draw the stroke on the screen. This control can be animated to good effect. It works most effectively when automatically animated through the use of the Write On and Write Off modes of the Stroke Animation menu.
Make Editable
This button appears only for Vector strokes. Clicking on Make Editable turns the current stroke into a polyline spline so that the shape can be adjusted or animated.
Paint Node Modifiers
Every paint stroke created in the viewer creates an associated modifier stroke. These modifier strokes are represented as a list of paint stroke operations in the Modifiers tab of the Inspector. Each stroke you create can be modified or deleted, or applied in a different order using the modifier stack.
Each Paint modifier stroke contains Brush controls, Apply controls, and Stroke controls identical to those found in the main Controls tab of the Inspector.
Paint Node Keyboard Shortcuts
Keyboard shortcuts allow you to adjust painting styles and color without having to navigate menus.
While painting
Hold Command or Ctrl while left-dragging to change brush size. Hold Option or Alt while clicking to pick a color in the viewer
While cloning
Option-click or Alt-click to set the clone source position. Strokes start cloning from the selected location. Hold O to temporarily enable a 50% transparent overlay of the clone source (% can be changed with pref Tweaks.CloneOverlayBlend). Press P to toggle an opaque overlay of the clone source.
While overlay is showing
Arrow keys change the clone source position; you can also drag crosshairs and adjust angle control or size sliders. Option + Left/Right or Alt + Left/Right Arrow keys change the clone source angle. Option + Up/Down or Alt + Up/Down Arrow keys change the clone source size. Shift + Command or Shift + Ctrl can be used with the above for greater or lesser adjustments. Left and right square brackets, [ and ], change the clone source Time Offset (this requires a specific Clone Source node to be set in the Source Node field).
Copy Rect/Ellipse
Shift + drag out the source to constrain the shape.
With a single stroke selected
(not available on multi or polyline strokes)
Press X or Y to flip the stroke.
Paint Groups
Command + drag or Ctrl + drag to change the position of a group’s crosshair, without changing the position of the group.

