Today we will be making a Motion Graphics title sequence in DaVinci Resolve Fusion. I would say this is an intermediate level motion graphics project. I might skip over some beginner steps in this tutorial so check out Fusion for Beginners if you’re just getting started using DaVinci Resolve Fusion.
My project files they are available through the pro membership
Coming up with this look took a little bit of time, I wanted to play around with a particle system since I haven’t played with that system in quite a while, so we will be working with a particle system as well as 3D nodes.
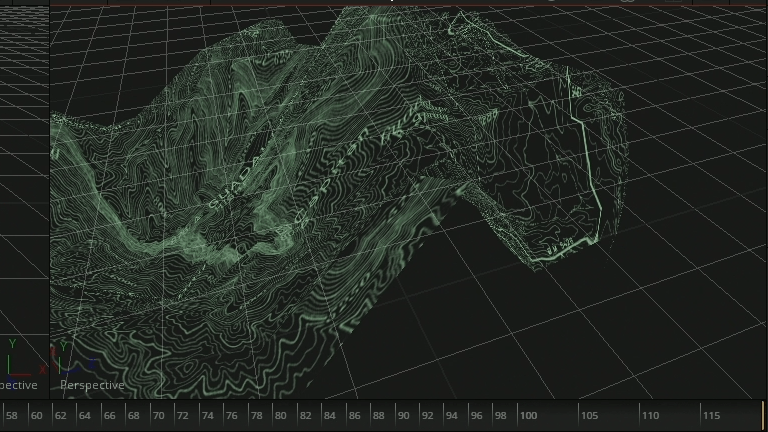
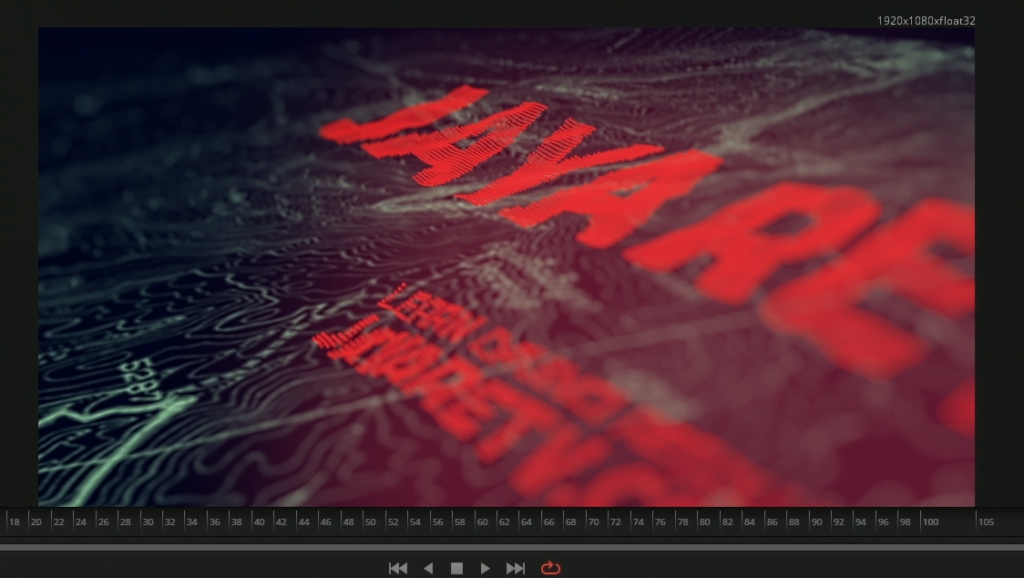
Everything in this project was created within Fusion except for the topographic map. For this tutorial I used a random topographic map. If this was a real project I would probably use a topographic map that was connected to the area the project was representing.
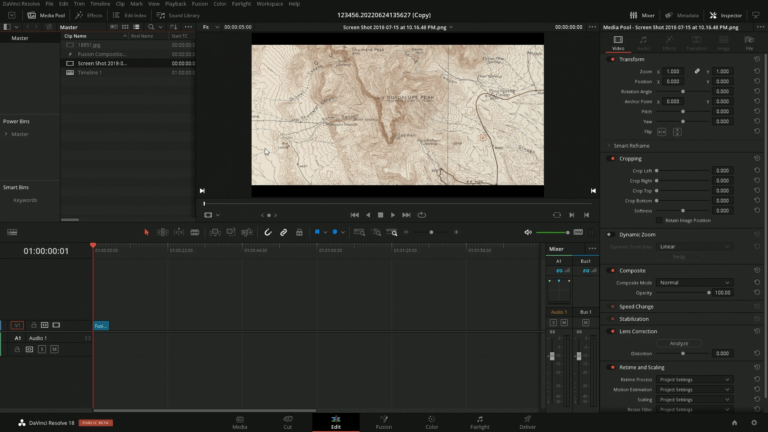
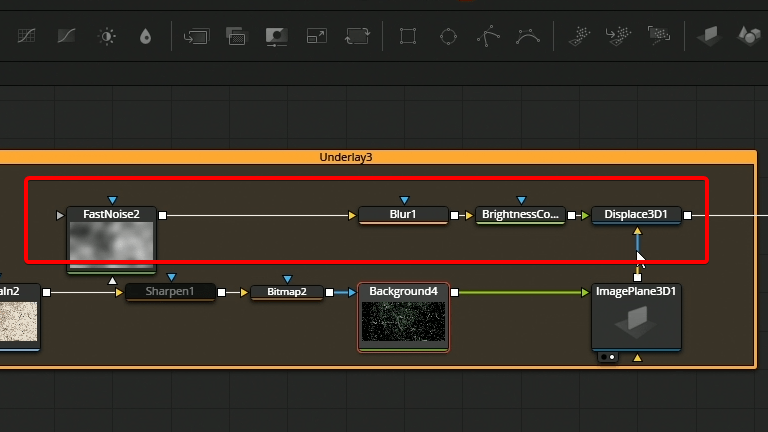
We start by bring the map in DaVinci Resolve and run right into fusion. Next we will begin with fedding the map it right into a bitmap and change the channel to luminance in order for us to use the brightness of the image as a mask for a background node
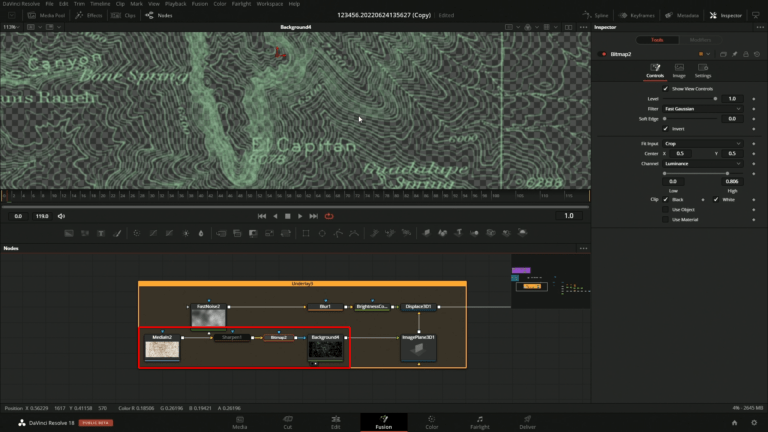
We next feed discolored map into an image plane so that we can move it around in 3D space.
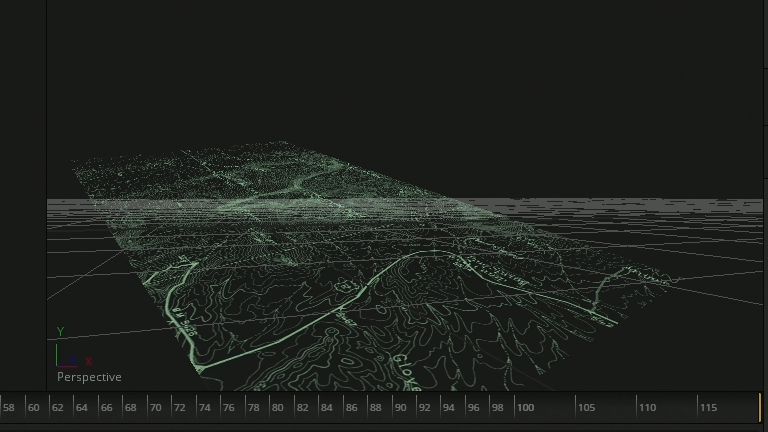
The map currently looks very flat so in order to add a bit of curvature to the map I use a 3D displace this place with a fast noise connected to it because the curvature of the map doesn’t really have to be at I just don’t want it to be completely flat.
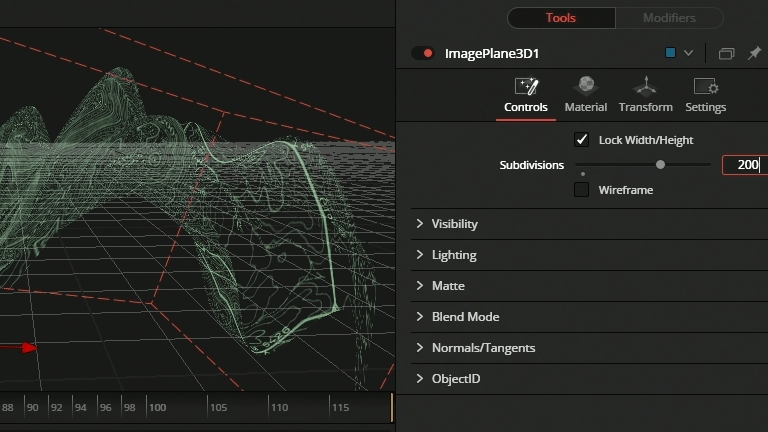
After adding in the displace and cranking it up you’ll notice that the map will be very jagged and that’s just because it has so few subdivisions to fix this you can go into your image plane and increase the amount of subdivisions to have a smoother displace apply to your map
Adding more subdivisions is very simple you just go into your image plane in within controls there is a subdivisions slider if you need more subdivisions then you can access with the slider you can just type in any value.
For my final result I ended up taking the this place and reducing the strength of it so that it wasn’t so extreme with how much a deformed my map.
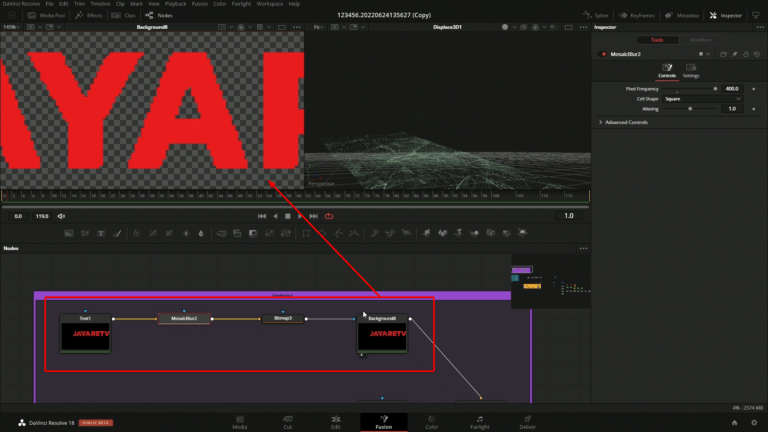
Next moving to the text I brought an text plus note to begin with, I then wanted the text to not have clean edges so I used a mosaic blur to get the pixelated look I’ve been wanted to crush the alpha channels so I fed that back into a bitmap so I could get rid of those values in the alpha Channel I’ve been piped this image into a background node to pull back the original color.
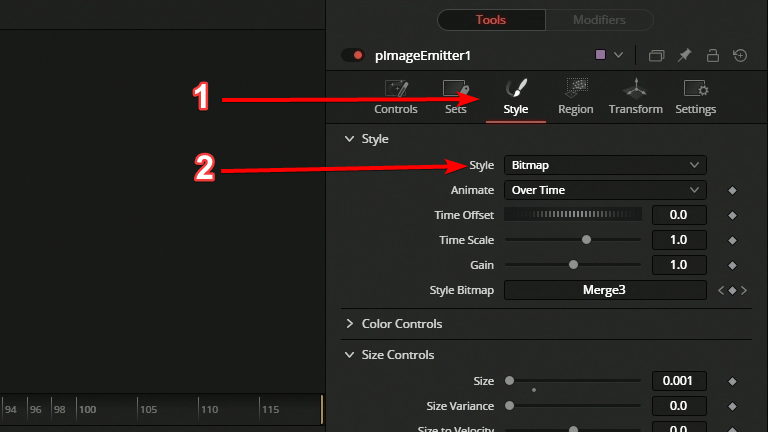
Now we’re jumping into the particle system and this is where it gets a little fiddly and you really have to play with the parameters until you get a look that you like. I bring the text into a image emitter which is going to use the image to create the location to admit particles the big thing with this node is you want to play with the X Y density in the emitter settings this is going to State the density of particle across the whole image. If you’re unfamiliar with a particle system you need to have two things you need to have in an emitter and a renderer so you have to have both of those to be able to see anything in a particle system so if you’re just starting to build this out make sure that you have both said that was so use the image emitter and feed that into a particle renderer to be able to see what you’re doing in the particle system.
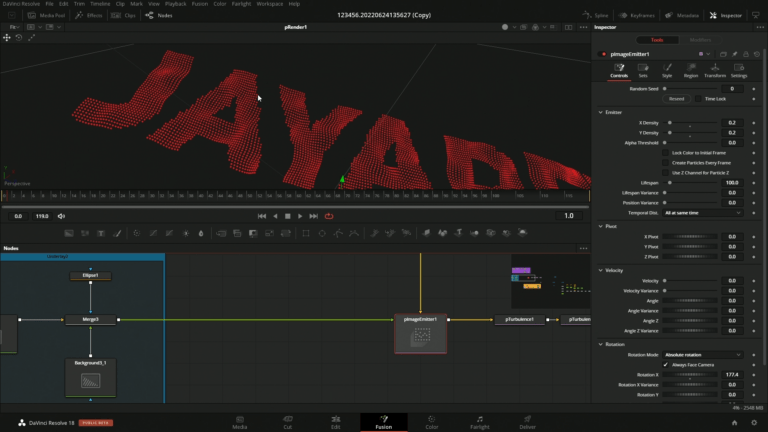
I want to have clean circle particles and I really didn’t like the ones that are built into the particle emitter so I created my own. the create your own particles you first need to go into your emitter and then in the styles tab you’ll see a styles drop down and you want to make sure that that is selected to bitmap that will add a new and put on your emitter node and you can create any shape and feed it into your emitter as the particle for your particle system.
One thing you’ll notice with your particle system is all of the particles are on a flat plane just like how the map was. I personally didn’t like how that looked so I applied turbulence to my particle system for 1 frame I then applied a friction node and maxed it out the very next frame so all the particles would simulate turbulence for 1 frame and then the friction would be applied to lock in the new position for the turbulence.

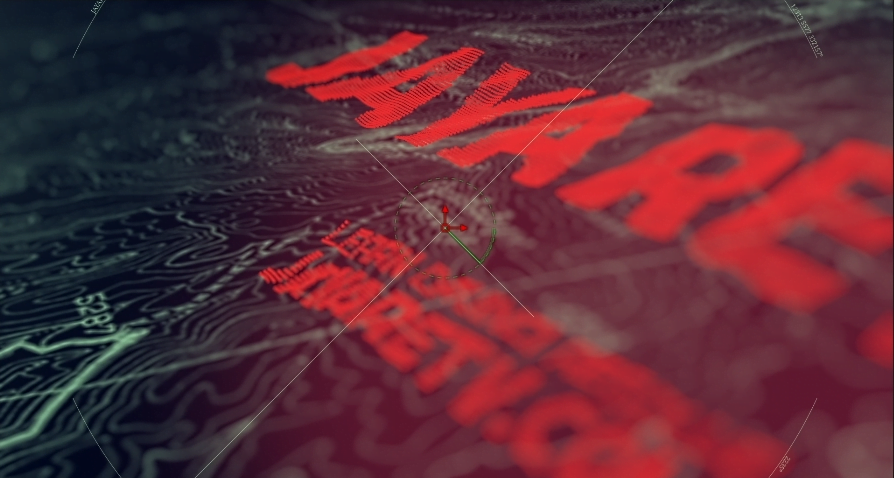
Now we have all of the elements created we just need to position them in our 3D scene add a camera moves in and anything extra that is aesthetically pleasing like lens blur and that kind of stuff.
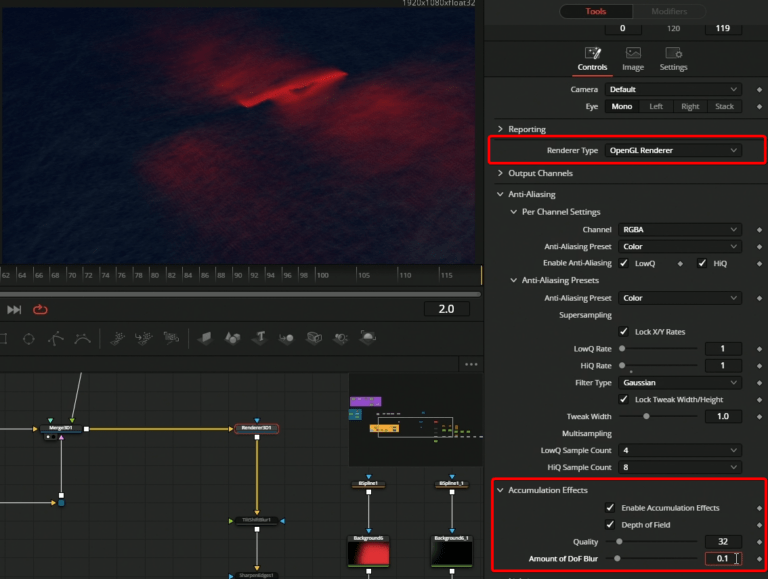
Since everything is in 3D we can take advantage of the depth in this 3D scene and have the camera render out depth of field.
If you’ve never used depth of field in the 3D renderer infusion the big thing to note is you have to turn on the renderer type to openGL renderer, then go down to accumulation effects and turn those on as well. Inside accumulation effects you will see a quality and amount of depth of field blur you’re going to tweet those. Within the camera there’s an option to see the focus plane that will allow you to see where the current focus is for the camera.
To add in a little extra flair I created a couple of light leaks with just a background node and a mask and also laid everything on a dark blue background since all of these elements in 3D space are transparent.
To finish off this whole look I just added a couple of overlay elements, very simple lines and circles with a little bit of text along the edges nothing fancy
As I said at the beginning of the tutorial if you would like my project files they are available through the pro membership.


