Your cart is currently empty!
Curves in DaVinci Resolve 16
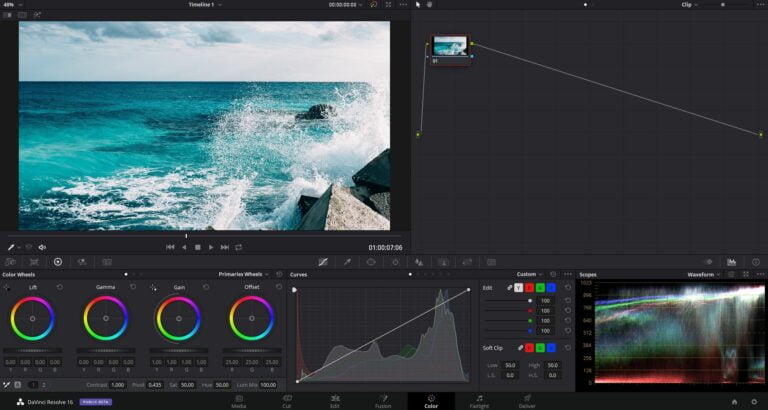
NEW DAVINCI RESOLVE 16 HISTOGRAM OVERLAY
Custom Curves has been updated in Davinci Resolve 16 with a new histogram overlay. The new overlay can be seen within each of the curves (Custom, Hue Vs Hue, Hue Vs Sat, Hue Vs Lum, Lum Vs Sat, Sat Vs Sat).
The new histogram overlay can pull data from the input or output of the color node. You can also turn off the histogram overlay.
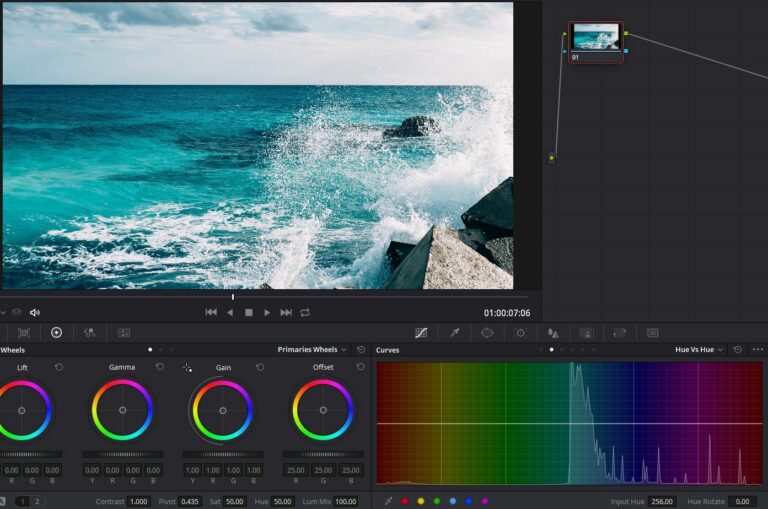
VS CURVES
The Vs curves also have the image data overlay for color and luminance data. It’s a quick way to see where colors fall to make adjustments.
HOW TO USE THE CURVES
Curves are a way to adjust the whole image and not an adjustment groups like the primary color wheels were you make adjusts to highlights, midtown, and shadows.
Once you learn how the curves work you’ll see a great Improvement in your ability to color grade your footage. As you can see in the image below the image data is drawn in the curves with the left side being shadow data and the right side being highlights. The adjustments within curves is set up with the shadows at the bottom and the highlights at the top.
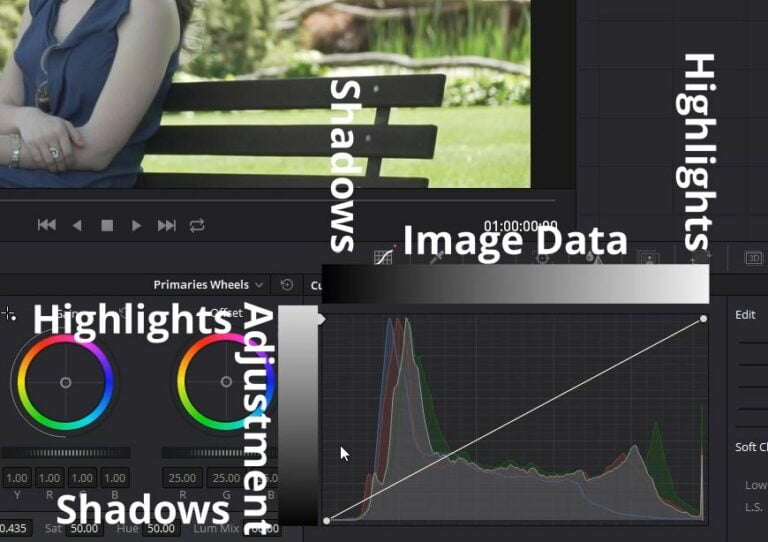
If you wanted to move your mid-tones brighter you would grab a middle point and move it up.
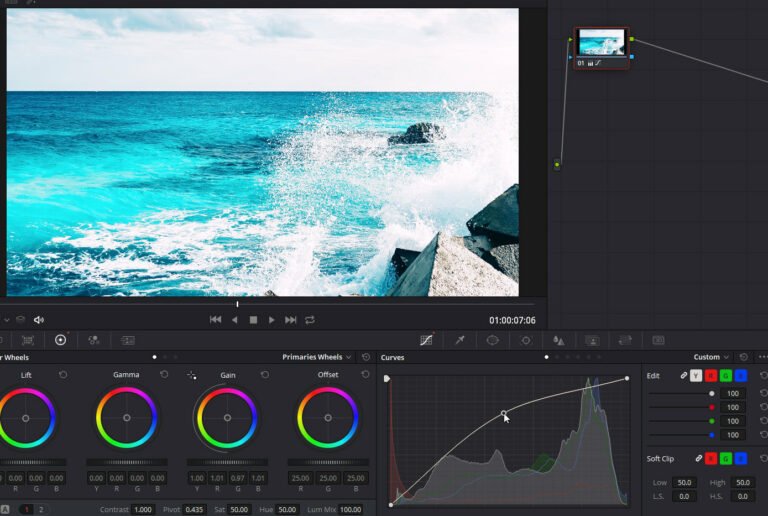
You can add as many anchor points as you wish within the curve adjustment.
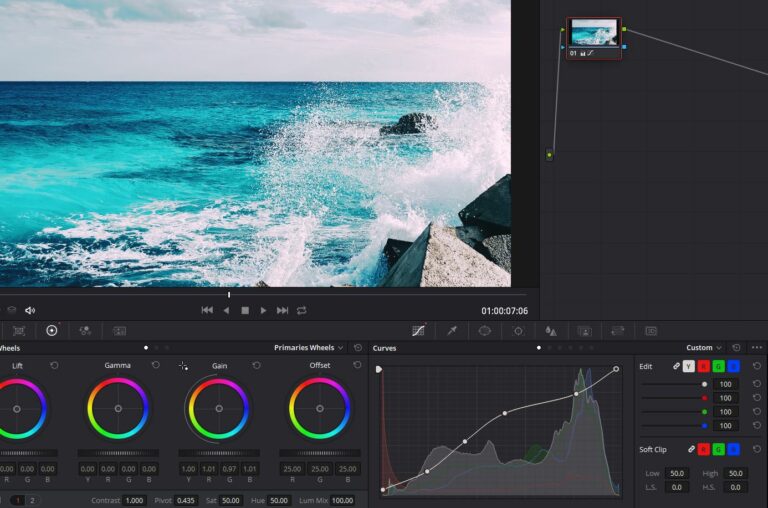
To the right of the curves window you can adjust the intensity of the selected channels adjustment effectiveness. You can also ungroup the channels to make custom curves for each color channel.
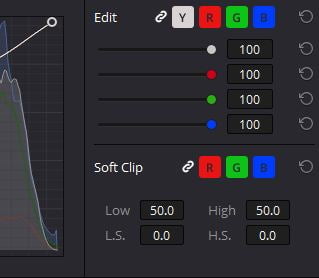
Next is the soft clipping area. You can change the image clipping here you can also add a soft clip to have the luminance level roll-off.
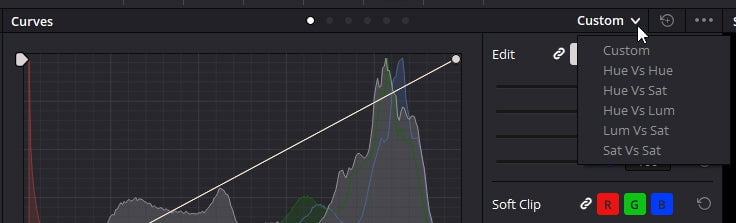
Along the top you can click on the dots or the drop-down menu to change which curves are currently active.
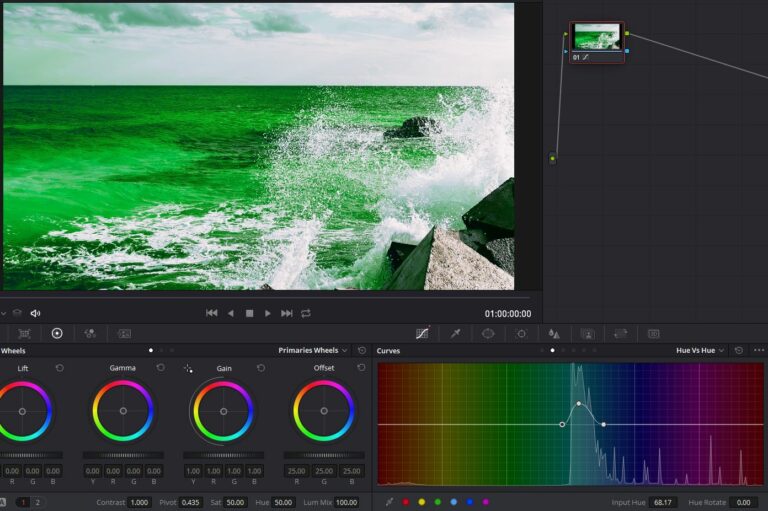
Each of the versus curves acts a little differently but they all fall the same principle. the first item is going to manipulate the second item. the first one in the drop-down is hue vs hue. the easiest way to explain this is you’re going to pick a color in the curve and you’re going to manipulate that color with a different color selected. As you can see we’re picking the blue in the water and we’re going to either move up or down to change the color to a different color. One thing that you will notice, the yellow in the rocks and the white in the water are not affected because that isn’t a color that’s selected currently in this curve.
Each of the other curves work in a similar fashion Hue vs. sat is a curve where you can pick a particular color and increase or decrease the saturation of that specific color.
Here’s a little cheat sheet for those who aren’t familiar with the lingo in this drop down.
Hue – Color
Sat – Saturation
Lum – Luminance ( Brightness )
In: Color
Leave a Reply