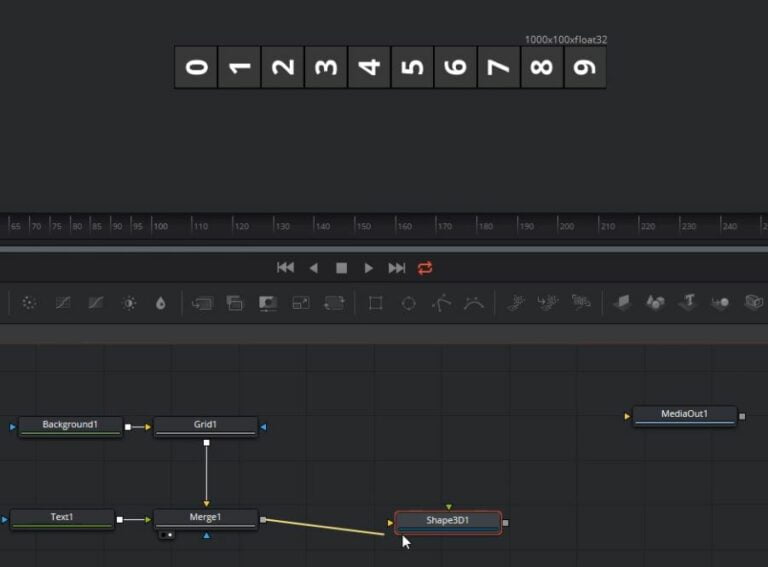
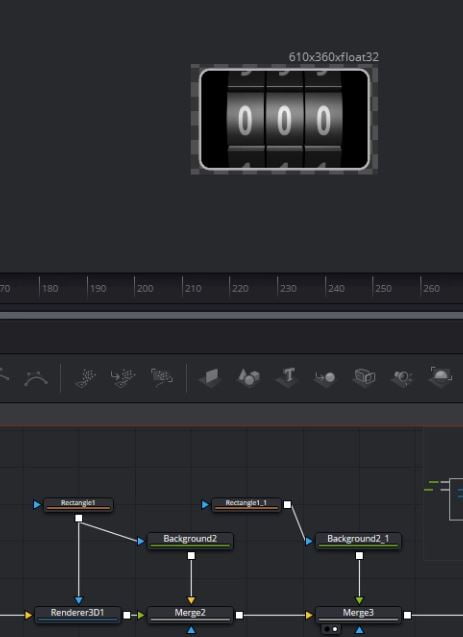
To build the odometer within Fusion we use a simple background node with a grid over the top. Within the grid we 0 to 9 and connect everything into a Shape 3D node.
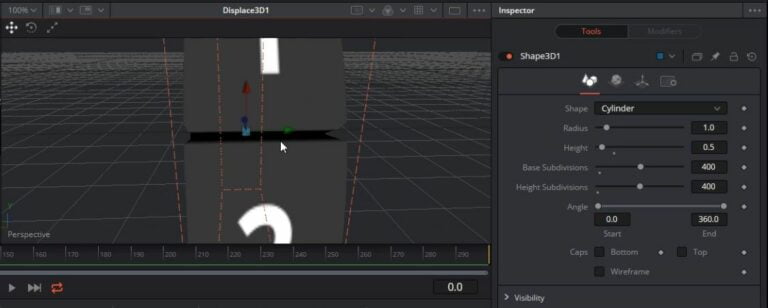
You will want to change the shape 3D node into a cylinder.
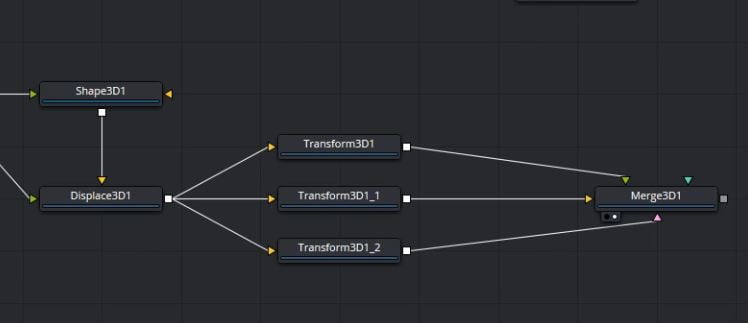
Next to raise the number we connect in a displace 3D node. We will use the grid to power the displace. Once connected you’ll notice odd looking displace this is do to a lower number of subdivisions. You should crank up the subdivisions count.
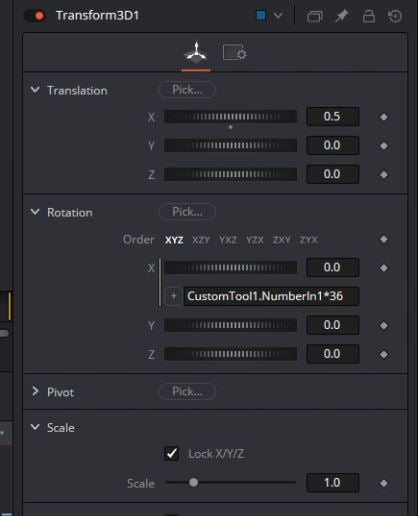
To power each dials movements, feed everything into transform 3D nodes. One transform 3D for each. Connect everything into a merge 3D next.
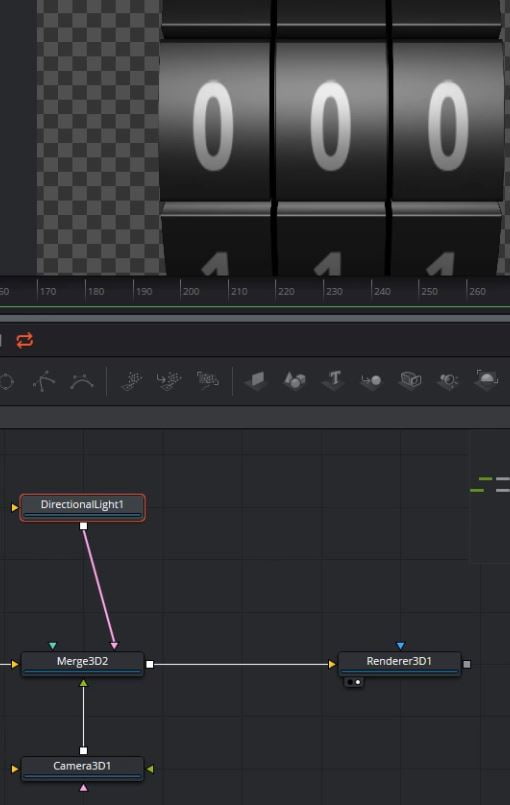
Now that we have the dials build and split into separate controls we can add our 3d camera, renderer and lights. I went with a directional light to keep this simple.
To finish this up add a background and border after the render3d node.
To make animating easy you might want to make a custom tool node to link the transform 3d nodes to. I setup one with hundreds, tens, ones, and spin control to change the number of times to spin.
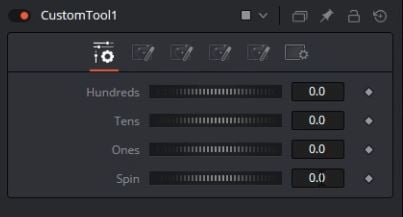
You will need to connect the transform 3ds to the custom tool.
Make sure to connect the MediaOut node to the end of your node tree.


