The Animation Curves Modifier (Anim Curves) is used to dynamically adjust the timing, values, and acceleration of an animation, even if you decide to change the duration of a Comp. Using this Modifier, it becomes infinitely easier to stretch or squish animations, create smooth motion, add bouncing properties, or mirror animations curves without the complexity of manually
adjusting splines.
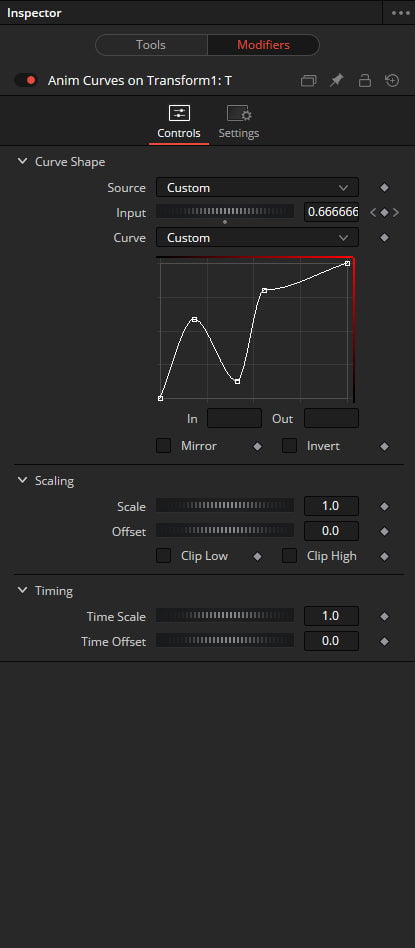
CURVE SHAPE CONTROLS
The controls for the Anim Curves Modifier appear in the Modifier’s tab of the inspector. The Curve Shape controls determine the acceleration or shape of the animation curve.
Source: This drop-down menu has three options based on how the Comp is created from DaVinci Resolve’s Edit page.
Transition: This setting is automatically selected when the Comp is created from an Edit page transition effect. If the duration of the transition is updated in the Edit page, the timing of the animation updates as well.
Duration: Use this setting when the Comp is created from a clip on the Edit page. The animation timing will update if the clip’s duration changes by trimming.
Custom: Displays an Input dial to manually control the timing.
Input: This dial is only visible when Source is set to Custom. It is used to change the input keyframe value
Curve: The Curve drop-down menu selects the interpolation method used between keyframes. The three choices are linear, easing, or custom.
Linear: The default linear interpolation method maintains a fixed, consistent
acceleration between keyframes.
Easing: Displays interpolation menus for both the start of the curve (In) and the end of the curve (Out).
Custom: Opens a mini Spline Editor to customize the interpolation from the start of the animation to the end.
Mirror: Plays the animation forward, and after reaching the end, it returns to the starting value. This causes the initial animation to be twice as fast since the second half of the Comp is used for the reverse animation.
Invert: Flips the animation curve upside-down, so that the values start high and end low.
SCALING
The Scale parameters modify the animation values using relative adjustments.
Scale: This number is a multiplier applied to the value of the keyframes. If the Scale value is 2 and a keyframe has a value of 0, it remains 0. If the Scale value is 2 and a keyframe has a value of 10, the result is as if the keyframe is set to 20. This can be thought of as the ending value for the animation. It is best to set this while viewing the last frame in the comp.
Offset: The offset is added to the keyframe values and can be thought of as the starting value for the animation. It is best to set this while viewing the first frame in the comp.
Clip Low: Ensures the output value never dips below 0.0.
Clip High: Ensures the output value never exceeds 1.0.
TIMING
The Timing parameters adjust the animation timing using relative values.
Time Scale: Stretches or squishes the animation, causing it to run faster or slower. A value of 1.0 keeps the animation running for the Comp’s duration (unless you have customized the animation using other controls in the Modifier).
Time Offset: This value delays the animation, as a fraction of its total duration. A value of 0.0 applies no delay. A value of 0.5 delays the animation starting point midway into the Comp’s duration.


