Reordering clips
Having the clip selected and using shift+ctrl , or . you can easily move clips around on the timeline without the concern of leaving gaps. When using this feature make sure you take into account the auto track selector. The other track selector is going to make sure everything that’s enabled stays in sync. depending on what you’re moving sometimes this can be an issue if you only want to move Clips on one track instead of having all tracks shift to stay in sync.
Place clip between clips on the timeline
Adding a clip from the media pool into the middle of our timeline or between clips is a pretty common thing to do. Manually selecting all of the clips and moving them to make space can quickly become time-consuming, simplifying this process by using what is referred to as an insert edit is ideal. Insert edits can be done one of three ways.
1. By default The DaVinci Resolve keyboard shortcut is F9. Selecting a clip in the media pool and then hit F9 will insert whatever is in the preview monitor into the timeline where the play header is.
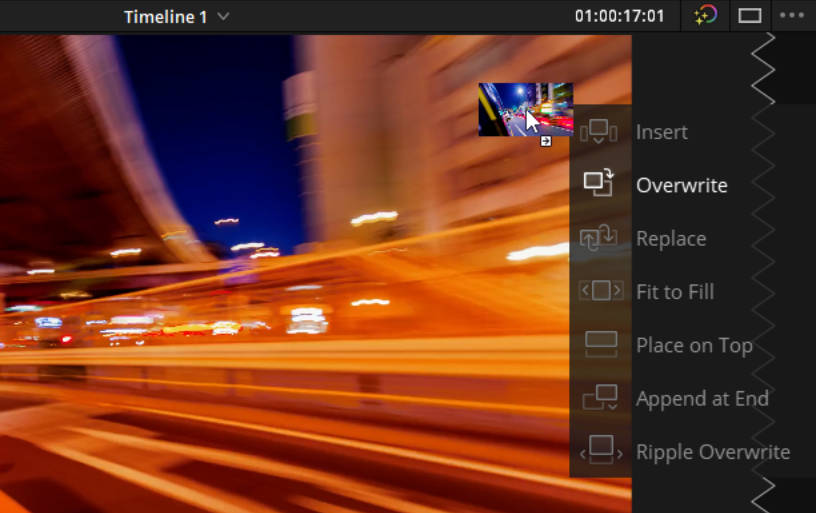
2. You can drag whatever is in the preview monitor into the timeline monitor and an option panel will pop open with all of the possible edits that are available dropping the clip on to the insert replace the clip on the timeline wherever the play head is.
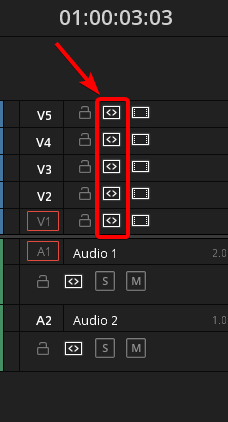
3. Once you have the media selected use the the toolbar button. In the middle of the DaVinci Resolve UI you should see a insert edit button you can click.

Shift timeline to lengthen clip
The trim edit mode is a great way to change the length of a clip that is already on the timeline without affecting the edit points of other clips on the timeline. Using the trim edit mode tool really helps with making sure other portions of your edit don’t become out of sync as everything will be affected as long as the auto-track selector is on for the tracks which are on by default.

Remove clip and keep or remove space
There are a few different options for removing clips on the timeline. We can either remove the clip and keep the space or we could remove the clip and delete the empty space. Deleting a clip is just called deleting a clip but deleting the clip and the space it occupied is referred to as a ripple delete.
- On a PC: Backspace will delete the clip. Shift+Backspace or the delete key will ripple delete the clip.
- On a MAC: Delete key will delete the clip. Forward Delete will ripple delete the clip.
Select everything after playhead
Sometimes making gaps on the timeline is required. Being able to select everything after your playhead would be ideal so you don’t accidentally miss something really far down the timeline or is on a completely different track that isn’t currently visible. The quick and easy way to select everything is by using alt+Y on PC or option+Y on MAC to pick everything on every track after the playhead.


