Blurring in DaVinci Resolve is quite easy. The majority of our blame process will all be done on the color page, if you’re in the middle of an edit you can jump into the color page to blur an object and then go back to the edit page to continue your edit or you can just blur whatever it is once you’re done editing and you’re on the color page, either way works it really works.
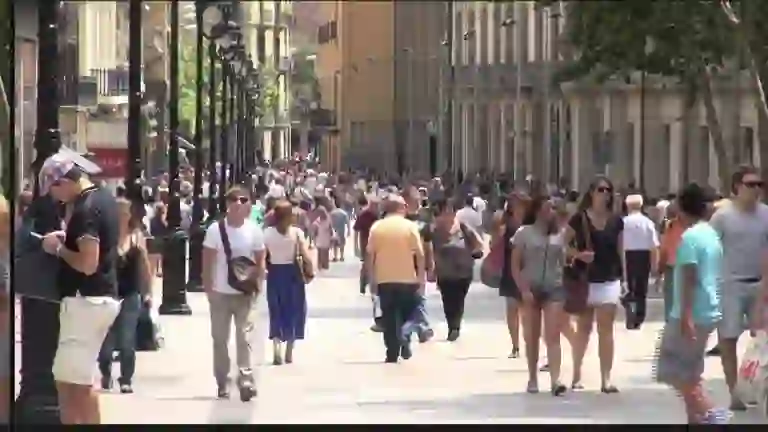
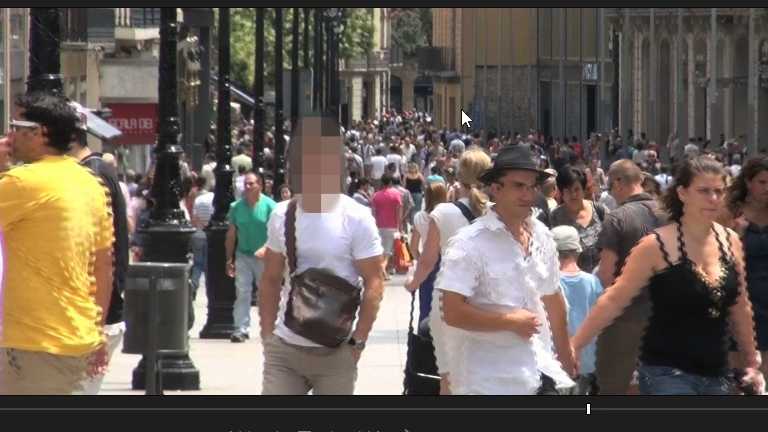
The process of tracking and bluring is super simple. If we have something cross in front of the object we are trying to track we tend to have issues with the tracker staying locked on the initial object. As you can see below we are going to track the person in the white shirt but a group of people walk in front of him, this type of situation tends to result in issues with the tracker that requires us to manually adjust.
We will be blurring the person in the white shirt.
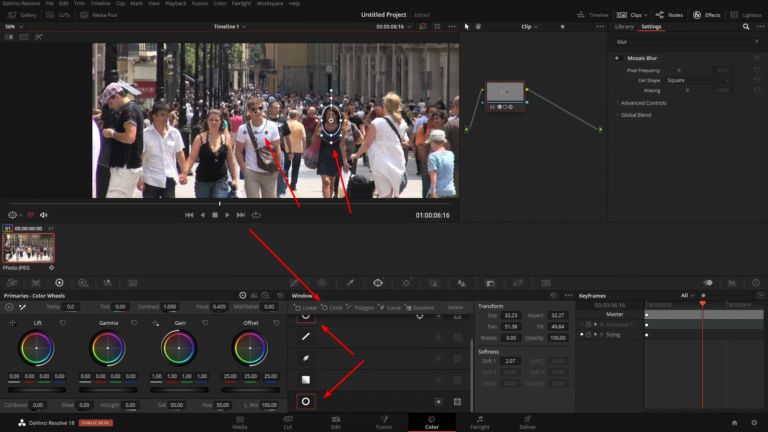
Once we go over to the color page we can easily add in a blur by using the blur tool
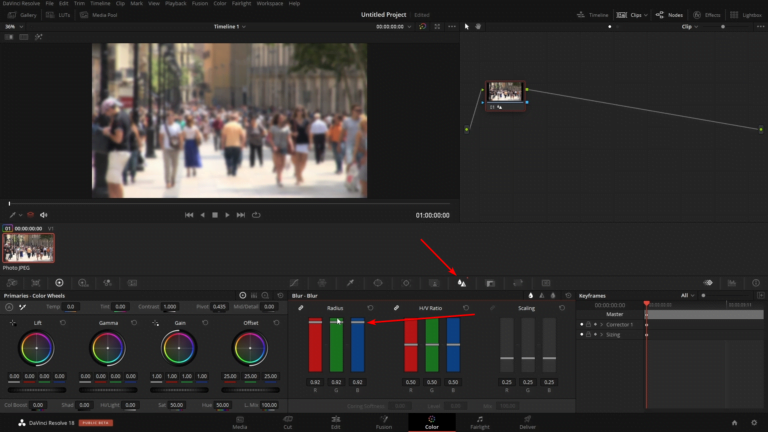
Without adding any mask you can see that the whole image is blurred so we’ll need to add in a mask to isolate the area in which we are blurring.
Once we have everything set up we can go over to the tracking Tab and begin tracking this mask (Window)
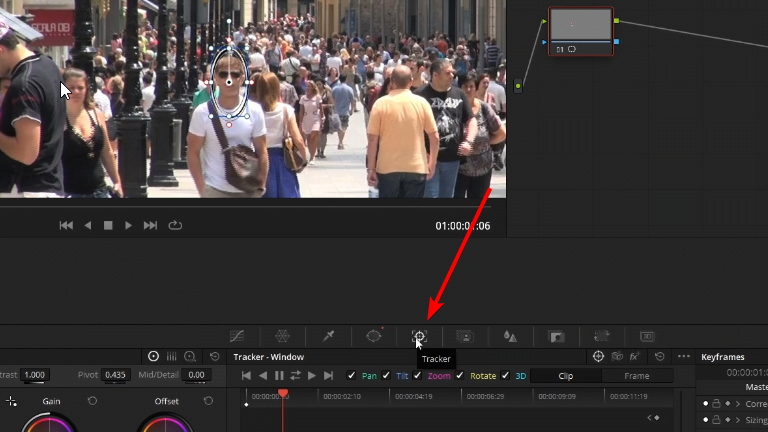
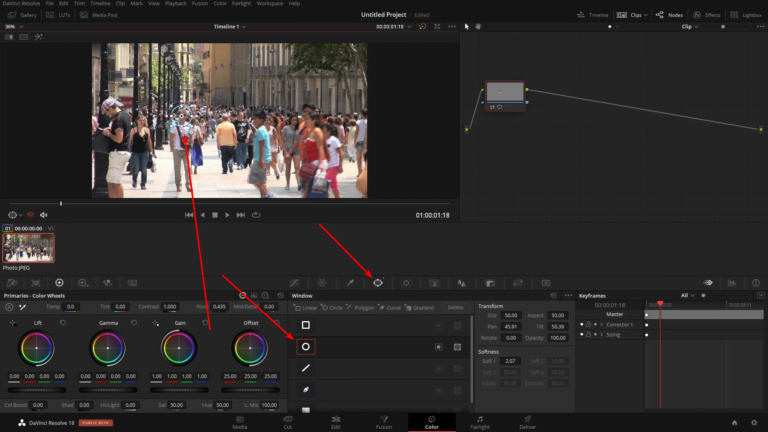
We’ll need to uncheck rotation and 3D because they yield undesirable results when tracking as seen below
The next issue that we will have to deal with is when the group of people walks in front of our subject. As you have seen the tracker moves with the group and leaves our subject.
We have two different modes to adjust the tracking information for this power window. We have clip mode and frame mode
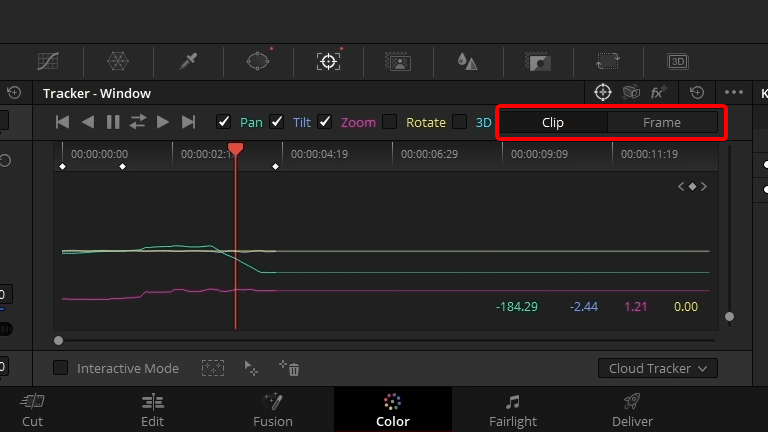
Think of clip mode as an offset and frame mood as a frame adjustment that will add a keyframe in for each I just meant.
Since we will be using this some of the tracking information we are going to use the frame mode so that we can fix the tracking information that was incorrect.
Once we have clicked the frame mode button we can move the playhead to the problem area and adjust the power window to be over our subject. You should see a key frame applied to the tracker window for each adjustment.
Once we have all the tracking information completed we can go back to the Blur tab and increase the blur if you want a normal blur effect, or you can also add in a blur resolve fx. I like to use the mosaic blur. You can find this blur in the effects tab.
If you need to blur additional faces you can easily go back into the window tab and add in another Circle power window and do the same steps we took to track the first power window.