A few things I use when editing in DaVinci Resolve that I adopted over time.
0:00 Intro
1:03 Drag into bin area to maintain folder structure.
3:04 Using clip colors for later edits
4:48 Adding annotations to markers
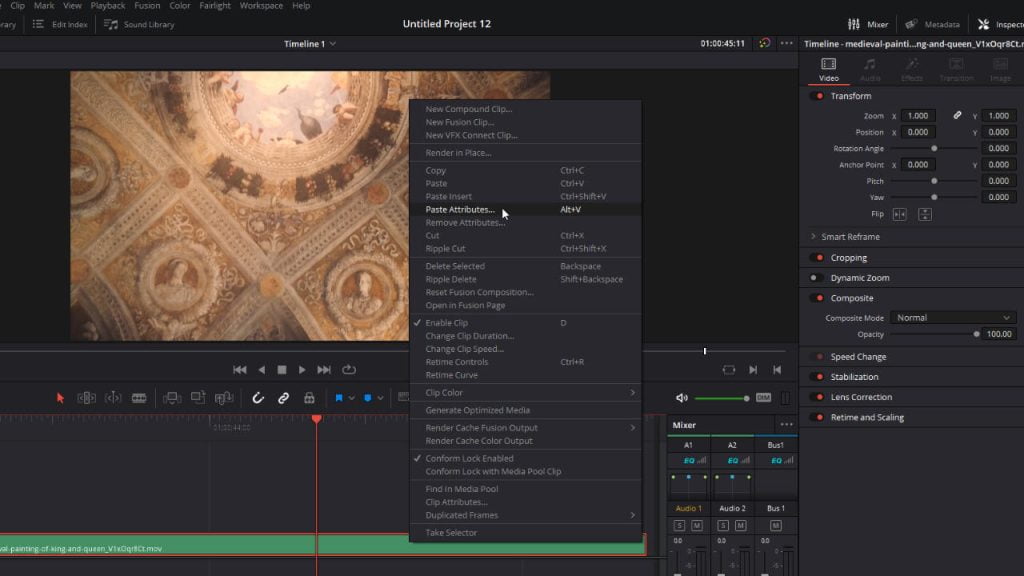
6:48 Copy and paste setting (attributes) from clip to clip
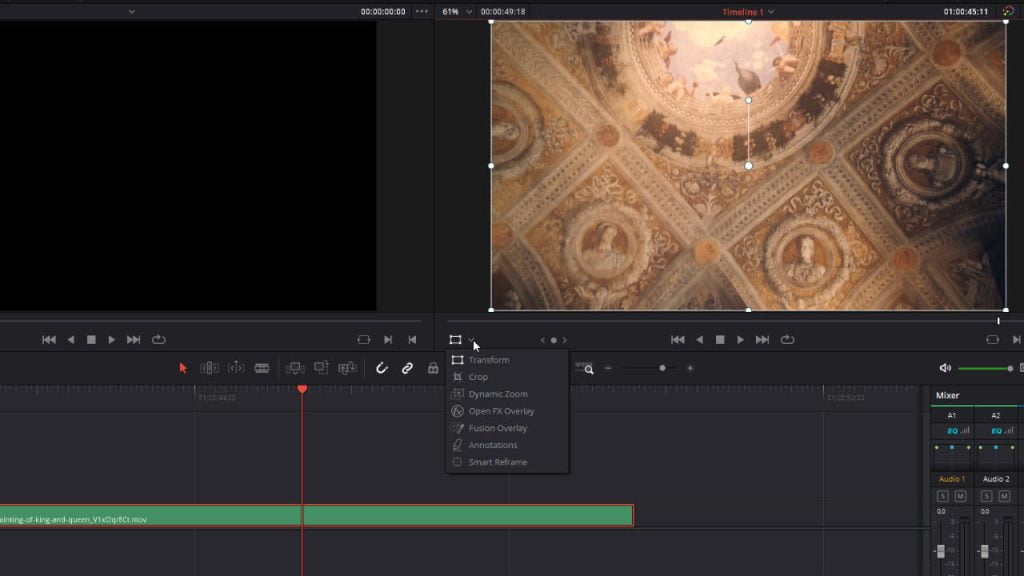
8:16 Using on-screen transform tool
9:23 Quickly review all available footage and add to main timeline
First we’re going to start off with maintaining the folder structure within the bins area in DaVinci Resolve. If you’ve ever worked with media that was prepared for you, a lot of the time different assets will be put in proper folders. You might have music in the music folder, camera one in a camera one folder or maybe it’s broken up into different locations. The folder structure can be preserved by dragging everything from your file explorer into the bin area instead of the media area in the media pool.
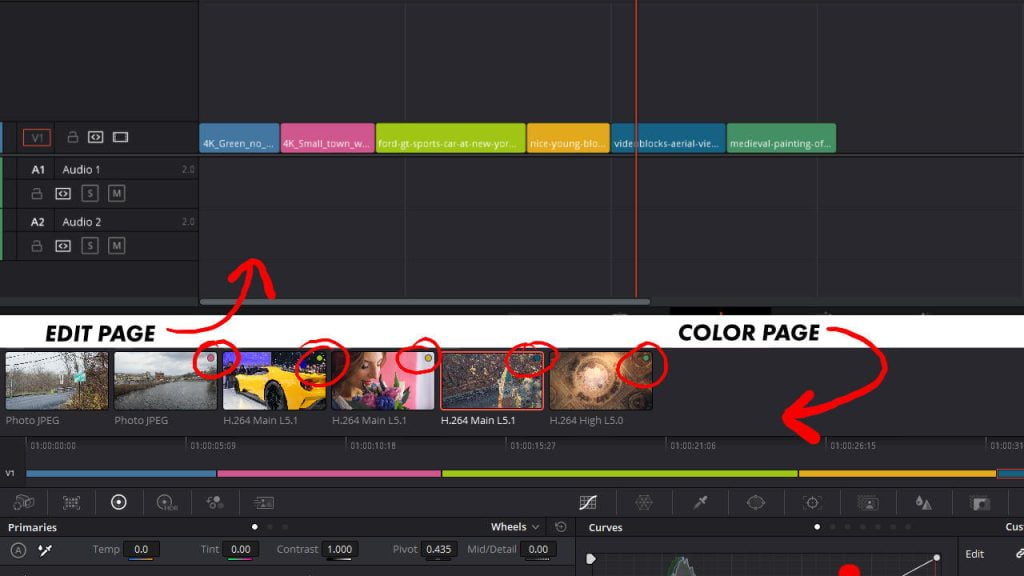
Using clip colors is really good for indicating what a clip is or what it might need. The clip color is also represented on other pages within DaVinci Resolve. Personally I find this very useful to use specific color for clips that need to be blurred out for confidential reasons. I typically blur everything using the color page and power windows. There are other ways to blur within resolve but this workflow has been around since I had initially started using DaVinci Resolve 7ish years ago, so it’s my go-to out of simplicity.
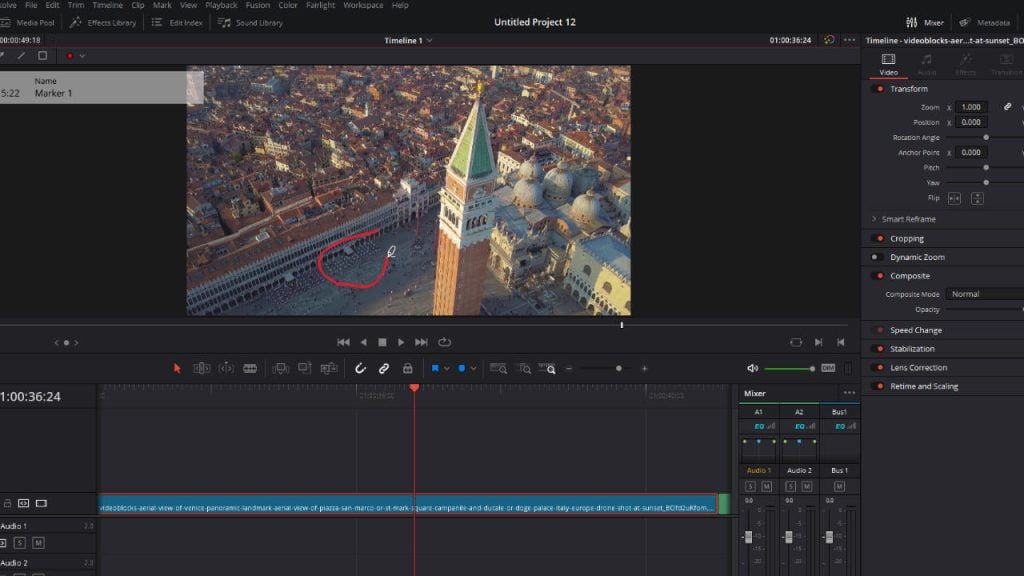
Adding annotations is a great tool when you’re working with others or large projects where you might forget the specifics of things that need to be altered. Annotations allow you to draw on individual frames, this enables you to draw attention to things that might need to be altered. Annotations are only seen in the preview when reviewing still frames. Annotations are not rendered out in the final render.
Next is using copy and paste attributes. When I first started using Resolve I would remember the input values from one clip and manually apply them to the other clips. Once I learned that I could easily copy and paste attributes with just a few clicks the process became extremely simple. You can find both “copy” and “paste attributes” when you right click on a clip in the drop down and if they’re pre-mapped to keyboard shortcuts you should also see this in the dropdown menu. Paste attributes won’t show up until you copy a clip with modified attributes.
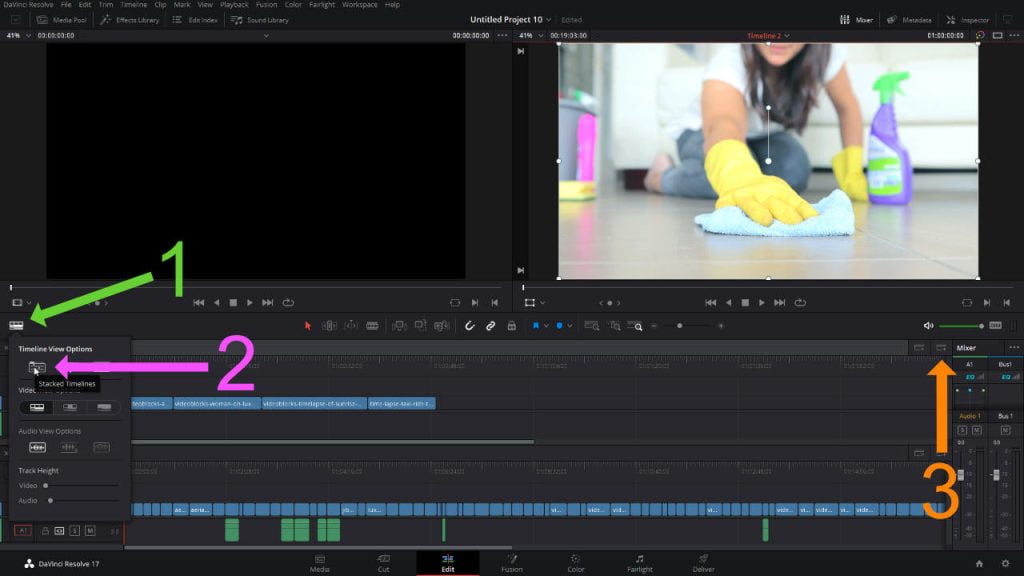
There are a handful of on-screen controls on the edit page that I didn’t initially know when I was first starting out using DaVinci Resolve but they’re very effective and definitely speed up the process when using tools like the transform tool. Clicking on the icon in the lower left of the viewer should enable these on-screen controls. Clicking on the down arrow allows you to see a list of controls.
For the next one I was quite shocked that so many people on YouTube found this to be so beneficial but there are multiple controls for viewing the timeline one of them that I really like to use is stacking time lines and having multiple open at the same time. I like using this to review footage that’s in my media pool. Like I initially said at the beginning of this article when you dragged in footage to create bin to replicate the folder structure you can make a timeline automatically containing all of that footage for each of the bins. I will then open that new timeline in my lower timeline window to review my footage quickly and pick my selects and add them to my primary timeline to build the sequence.