00:49 Where projects are saved
01:18 How to save a project file
03:56 how to prep for a project archive
09:13 How to make a project archive
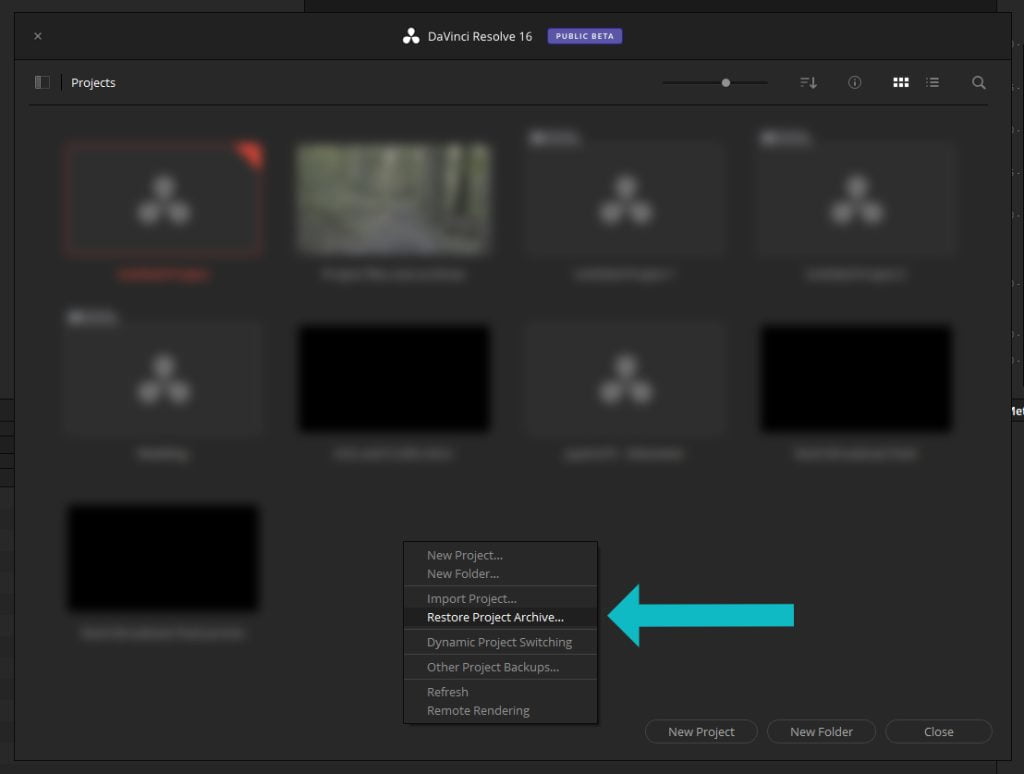
11:49 How to import a project archive
Where projects are saved?
When you hit save the project gets saved to your DaVinci Resolve database. The database will store all of the projects you work on within DaVinci Resolve.
How to save a project file?
First go to the project manager by clicking on the house in the lower right corner.
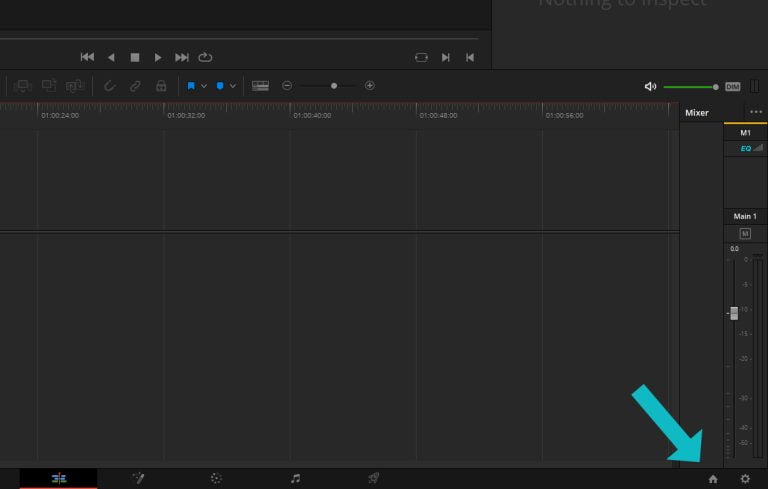
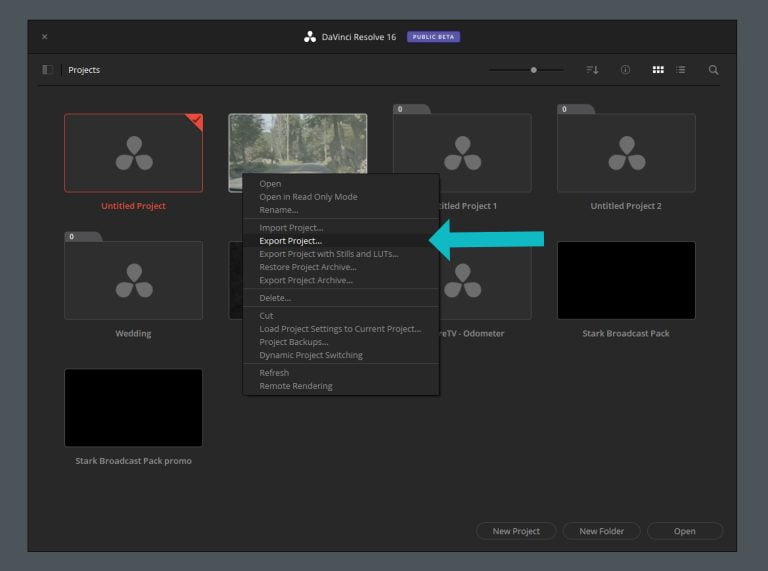
This manager window is also displayed when you first start DaVinci Resolve. Once the project manager window is open right click on the project you plan to save as a project file.
You should see a dropdown menu, look for export project in the list.
How to prep for a project archive?
If you’re working with a large project sometimes it’s wise to trim the fat from the project before creating the archive. If you’re like me when you’re starting a project you bring in lots of assets and possibly a library of music and much more. Oftentimes a large portion of these assets aren’t used in the final product nor are they needed in the archive, for this reason I like to remove a lot of the extra media that I didn’t use for the final project. I will typically not remove footage that was made for the project even if it’s not in the final product as I might need it for a later date if I ever need to come back to the project. The key things I will remove is extra music, any images I didn’t use as well as sound effects and stock media.
To get started you will want to jump to the media page. On the lower half of the screen shows what’s in the project currently. Click on the arrow to the right of the magnifying glass right above the list and pick “all bins”
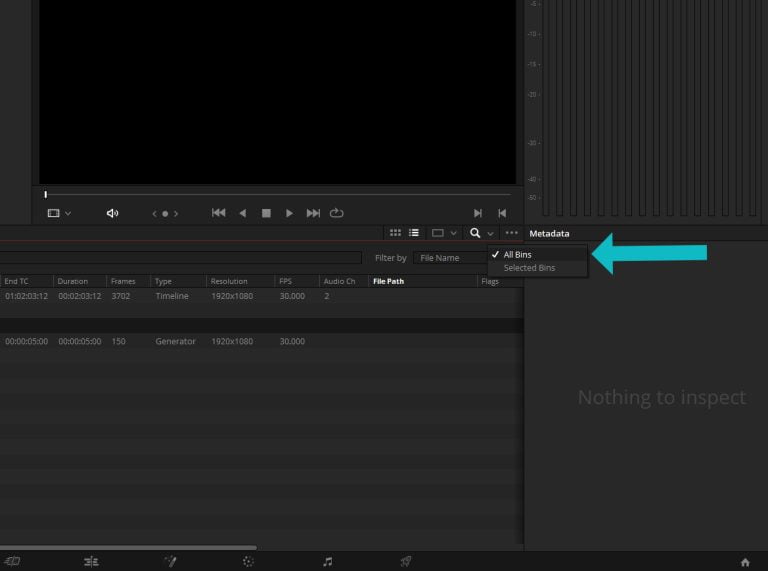
Clicking all bins will open up the search bar as well as show all media in your project. Next under “filter by” look for usage and select it. Next in the search bar we’re just going to type in a 0
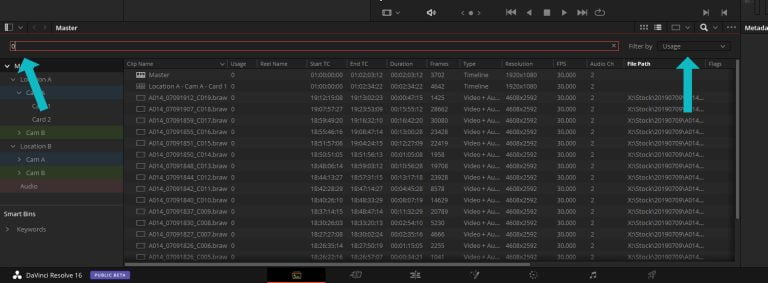
Now this list should show everything in your project that hasn’t been added to a timeline. One thing that I want to point out here is your master timeline is probably going to be on this list because nine times out of ten you’re not adding that timeline to another timeline, so under the clip name I like the click the arrow which sorts it by alphabetically but it also sorts it by type. So now that everything is sorted I just select all of the media and not the timelines. Make sure to only select media you haven’t used in the project that you deem can be removed for the project archive. After selecting everything I just hit the delete button to pull the selected media out of the project, this is not going to delete the files on your computer it only removes the files from the project.
How to make a project archive?
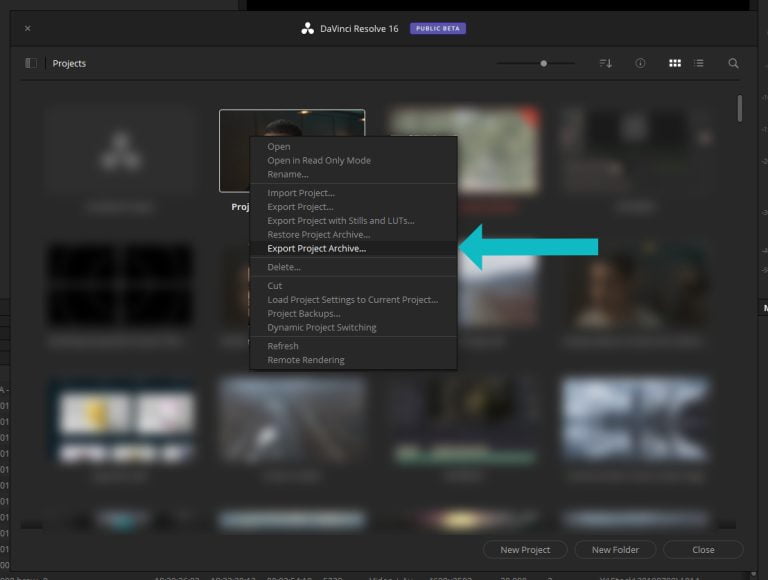
Once I have the project prepped and ready to create into a project archive I go back to the project manager (Little house in the lower right). Once the project manager opens you’re going to right click on the projects that you’re looking to archive and you’re going to click export project archive.
How to import a project archive?
Importing project archives is pretty simple it’s done in the project manager, this can be accessed by clicking the little house in the lower right it’s also the same window that’s displayed when Resolve first starts. In the project manager you will want to right click and click restore project archive and navigate to where you have the .dra folder. This will import the project file as well as linked to all of the media within the product archive folder.
