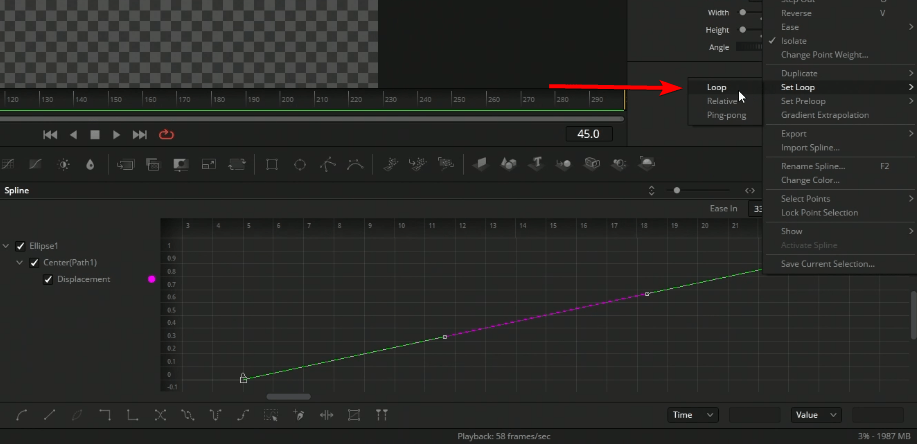
To loop keyframes in Fusion is fairly simple and is a significantly better way of looping an animation instead of duplicating the keyframes. To begin looping keyframes in Fusion we first need to create the fusion keyframes for the inputs we would like to have looping.
Create keyframes to loop in Fusion
For my example here I will be creating a path for the mask with keyframes of its position in different locations on screen at different times.

Next we will open up the spline window, highlight the keyframes we just made and right click and go to set loop from here we can set if we wanted to loop the keyframes or ping pong them.

After doing that now you will see a subtle line In the spline window showing progression of the loop

If you haven’t noticed already the loop is starting at the starting keyframe and continuing the loop for the rest of the fusion composition. The other way I like to use this tool is to use the ping pong feature.
Going back into the menu and picking ping pong will give you a slightly different effect as it will progressively go back to the starting keyframes instead of just jumping to the starting keyframe

Once you have your keyframe set in your Loop selected anytime you make adjustments to those keyframes in the loop the rest of the loop will see that adjustment as you can see here I added in a bit of easing in to my initial keyframes and you can see the loop also has the easing applied


