Bouncing audio within the Fairlight page in DaVinci Resolve is a powerful way to consolidate and simplify complex audio sections. Think of it like “baking in” all of your effects and edits, transforming selected elements into a single, continuous piece of audio media.
Why Use Bouncing Audio?
This technique offers several key advantages for your audio workflow:
- Simplify Complex Edits: It lets you bake in intricate edits, turning many small clips and adjustments into one manageable clip.
- Offload Processing: Bouncing is particularly useful for processor-intensive effects. By rendering these effects into a new clip, your system doesn’t need to process them in real-time during playback, freeing up resources.
- Render Inside Your Project: Instead of exporting segments externally for processing, you can perform this rendering step directly within your DaVinci Resolve project timeline.
When audio is bounced, it creates a new media file. The location where these files are saved can be specified in your Project Settings under Working Files > Project Media Locations.
How to Bounce Audio in Fairlight
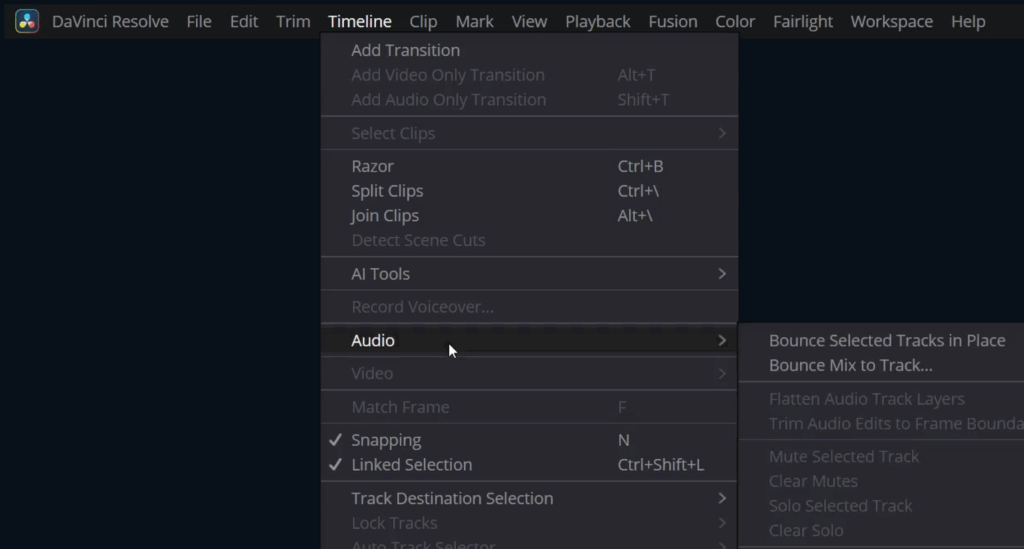
There are two primary methods available through the Timeline menu:
Bounce Selected Tracks In Place
- This command previously went by the name “Bounce Selected Tracks to New Layer.”
- Requirement: You must set In and Out points on your timeline to define the specific range you want to bounce. Without these points, the command will not function.
- Select the tracks you wish to include by Command-clicking (macOS) or Control-clicking (Windows) the track headers or mix strips.
- Navigate to the Timeline menu, then choose Audio > Bounce Selected Track In Place.
- The audio from the selected tracks within your In/Out range is processed and rendered into a new clip on each selected track.
- By default, with Layered Audio Editing turned off in the View menu, the new bounced clip will appear as the only clip in that section. However, your original audio remains underneath. Enabling View > Show Audio Track Layers reveals the stack of layers, showing the new bounced audio on top.
- This action creates a new media file saved in your project’s clip location.
Bounce Mix to Track
- This method allows you to bounce the output of one or more busses to a specific track.
- Go to the Timeline menu and select Audio > Bounce Mix to Track.
- A “Bounce Mix to Track” window will appear, listing your currently available busses.
- In the “Destination Track” column, choose where you want the bounced mix to land. You can select “New Track” or pick an existing track from the dropdown menu for the mixes you want to bounce.
- Click OK.
- The specified mix is processed, combined, and bounced into a new audio piece on the chosen destination track.
- Similar to track bouncing, this creates a new media file saved to your project’s clip location.
Bonus Tip: Bouncing Clip Effects
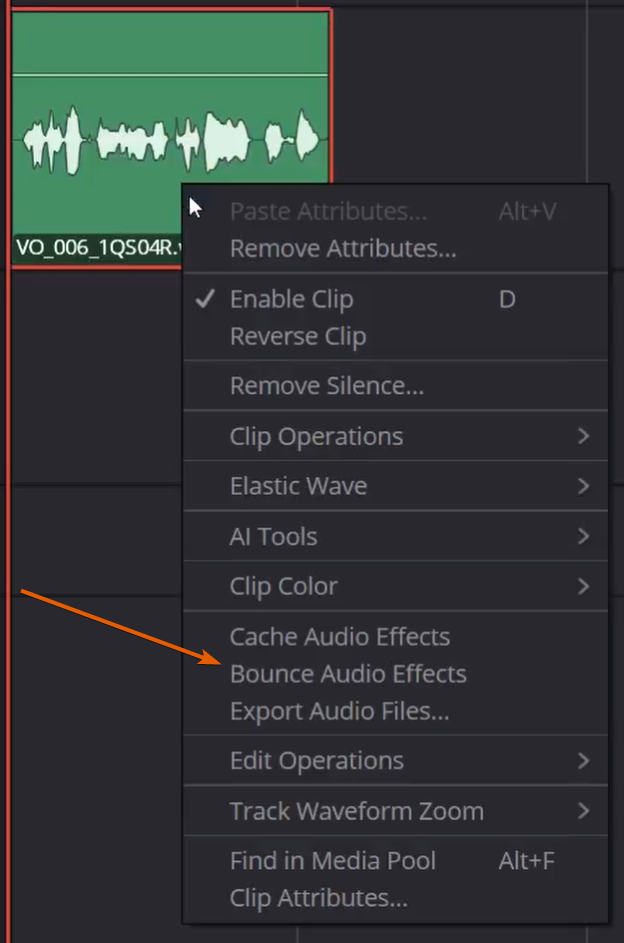
For even finer control, you can also bounce effects applied specifically to individual audio clips. This is done using the Bounce Audio Effects command found in the contextual menu when you right-click on a clip. This is extremely helpful when working with processor-heavy effects on a single clip, as it processes that effect just once into new media, rather than processing it every time during playback. As with track bouncing, if needed, the original is available underneath.
By utilizing these bouncing techniques in Fairlight, you can streamline your audio editing process, improve playback performance, and simplify complex timeline arrangements within DaVinci Resolve.


Start the discussion at postprolist.com